V9.2
Overview
After you set up a new storage location for attachment files, only new files uploaded to the system are stored in the new location. Existing files remain in the previous storage location.
Migrating the existing files to the new storage location is not a mandatory procedure, but a recommendation for all systems that upgrade from previous product versions to make sure that all attachment files are managed from a central location. Removing the files from the database saves server space and improves performance.
After you upgrade to V9.2, new file attachments are stored by default in a new SQL table (tblFileblobs). Existing file attachments remain in the old attachment tables. During migration, the system transfers all binary records from the attachments tables (old and new) to the new storage location. The migrated files are deleted from the SQL server and the new file path (URL) and connection to new storage location are stored in a new table (tblfiles).
NOTE
File migration is irreversible. After migration files are deleted from the Cora SeQuence database.
Migrating files to a new storage location does not impact Flowtime user experience and is transparent to end users.
NOTE
While copying from the database to the external storage, due to database connection errors some files are picked up in the next job cycles.
Prerequisites
Before you migrate existing files to the new storage location, you need to:
- Upgrade Cora SeQuence applications to V9.2.
- Upgrade Cora SeQuence database to V9.2.
- Set up the file storage.
For more details, see this article. - Validate the connection to the file storage.
Procedure
Set up a JES job to migrate files from the Cora SeQuence database to the file storage location defined as the default file storage connection.
NOTES
- There can be only one JES job that executes file migration.
- You cannot select which files to migrate to the new storage location. You need to migrate all the attachment files together.
- Back up the Cora SeQuence database.
- To create a File Migration job, go to Administration > Global Settings > Jobs Management, and click Add Job.
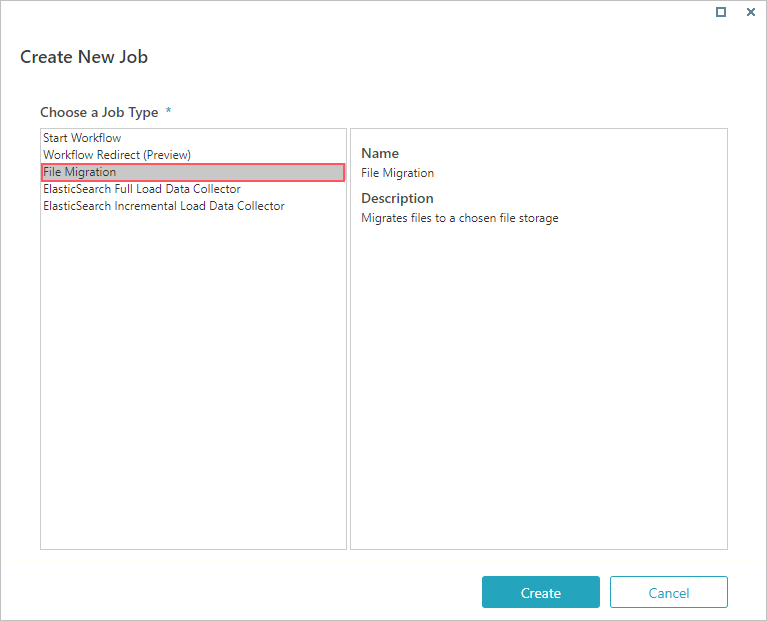
- In the Create New Job screen, select File Migration, and then click Create.
- Define the following settings:
- Name: Enter a meaningful name for the job.
- Job Host: The list includes the servers on which JES (Job Execution Service) is installed. Do one of the following:
- Select a server on which to run the job.
- If you want the system to allocate a server to run the job, leave the field blank.
- Job is enabled: Select this option only after you complete the workflow, or if you want to run the job for testing purposes.
- Job supports redundancy: This option is selected by default. Clear the checkbox if you do not want to enable redundancy.
For more details on job redundancy settings, see this article.

- Click Next.
- On the Command tab, set the batch size.
Increase or reduce the batch size, depending on the average size of the existing files.
NOTE
Set a smaller batch size for heavier files, and larger batch sizes if files are smaller.
- On the Advanced options tab, define the job execution schedule.
NOTE
To avoid bandwidth issues, set up the job to run at low peak hours or at predefined maintenance windows.
Some files may not be reachable while the File Migration job runs.
- Click Finish.
The File Migration job runs in the background until all files are migrated.
