Starting with V10.0, Cora SeQuence has been renamed to Cora Orchestration.
V10.5
Overview
Email conversation is a type of case-related conversation supported in Cora Orchestration. You can enable and configure the Email conversation type for a Solution, which allows users to compose and send ad-hoc emails from within the forms, and display case-related incoming and outgoing emails.
You can use the Email Composer as a stand-alone component embedded in a form, or use the Email conversation type as part of the Conversations View component in a Solution.
The To, Cc, and Bcc fields in the email composer display names of the recipients, and the users can add new email addresses to the address book in the system directly from the To, Cc, and Bcc fields.
Starting from V10.5, in the email composer you can now search for an email address or a name in the in the To, Cc, and Bcc recipients fields and the system fetches and suggests the email address from the address book for auto completion.
Configure email conversation type through the Conversations View
- In the Administration site, open the Solution from the list.
- In the Solution Components section, click Conversations View.
- In the Conversation View window:
- Select the Email conversation type to enable for the Solution.
- Add status change handlers for event handling.
For details, see the Configure conversation item events for the event handling section in this article below. - Add Email Settings.
For details, see the Email settings section below.
Email settings
| Email setting | Description | Parameter |
|---|---|---|
| Address - From | This address is used when no From address(es) is provided while calling the Email Composer. An invalid address displays an error. | A valid default email address. |
| Addresses - To | This list is used for the To, Cc, and Bcc recipients fields and is managed and displayed as a grid where you can add, edit or delete recipients email addresses. Select Disable auto suggestion option to disable an email address from appearing as auto complete suggestion in email composer. | A valid email address(es) for recipients' auto complete selection. |
| Email Templates | These templates help user standardize an email format and are created as a Cora SeQuence expression. You can also edit and delete existing templates. You need to have the master workflow configured to use its properties like activities, variables, and metadata in the message body and subject. The workflow properties are displayed on the right panel. | A predefined email template. |
| Email Signatures | These signatures help user standardize an email signature. You can also edit and delete existing email signatures. | A predefined email signature. |
Configure email conversation type through the Email Composer
NOTE
Email Composer is not available out-of-the-box so, you need to enable this for a solution first.
- In the Administration site, click and open a Solution from list.
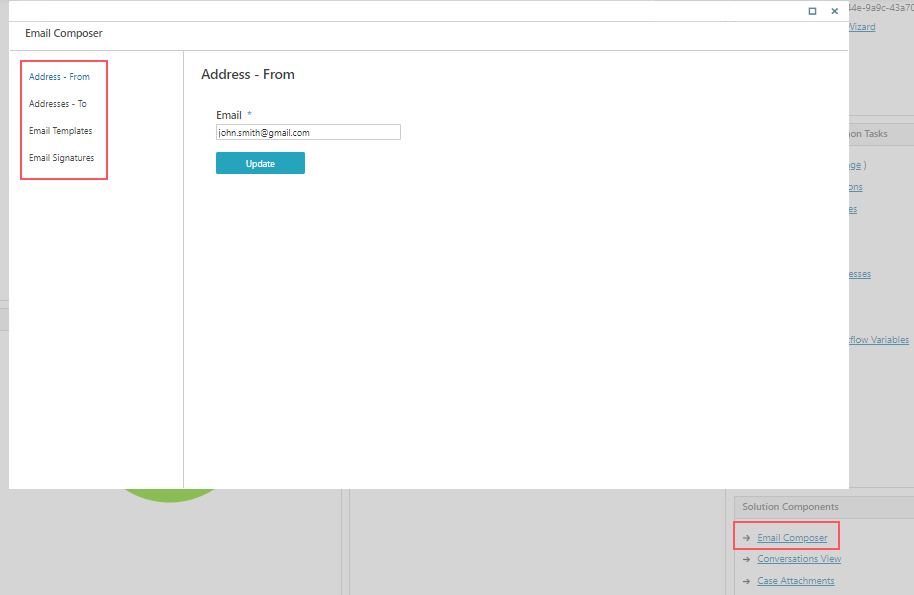
- In the Solution Components section, click Email Composer.
- In the Email Composer window:
- Add a valid default "Address - From" email address.
This address is used when no From address(es) is provided while calling the Email Composer. An invalid address displays an error. - Add valid "Addresses - To" email address(es) for recipients' auto complete selection.
This list is used for the To, Cc, and Bcc fields and is managed and displayed as a grid where you can add, edit or delete email addresses. - Add "Email Templates".
These templates help user standardize an email format and are created as a Cora SeQuence expression.
You can also edit and delete existing templates.
You need to have the master workflow configured to use its properties like activities, variables, and metadata in the message body and subject. The workflow properties are displayed on the right panel. - Add "Email Signatures".
These signatures help user standardize an email signature.
You can also edit and delete existing email signatures.
- Add a valid default "Address - From" email address.
IMPORTANT
As a developer, make sure no part of the expression fails in runtime. This leads the entire expression to fail, and send a corrupt email with no subject and/or email body.
It is advisable to use If and Try functions as much as possible.
Configure Email Sender job
With Email Composer, you need to configure an Email Sender JES job to send emails. The emails are sent asynchronously.
- Go to, Administration > Global Settings > Jobs Management, and click Add Job.
- Select Email Sender as the job type.
- Click Create.
- Edit the Job tab, as required.
- On the Command tab, add:
- Fetch Batch Size: Number of emails to be included in a single batch.
The batch includes emails in the "InQueue" state, or in the "Sending" state for longer than Abandoned Timeout. - Abandoned Timeout: Time to allow a conversation item to remain in the "Sending" state before it is considered as "abandoned", and ready to be fetched again by the job.
- Polling Interval: Time to wait between each database query to fetch conversation items with the "InQueue" state and abandoned emails.
- SMTP Connection Name: Name of the SMTP connection to use. It is defined in the General tables > SMTP connections. (for versions previous to V9.8.3.)
OR
Email Sending Connection Name: Name of the connection to use for email sending. (for V9.8.3 and later.) - Max. Retry Count: Number of retries to run before abandoning the batch and failing the job.
- Max Retry Interval: Time to wait between consecutive retries of the same email.
- Email Time to Live (TTL): Time for an email conversation item to stay in the "InQueue" state before moving to the "Sending" state.
- Send Emails with Custom Email Headers: Optional. Custom headers to be added to the emails sent from the Conversation View. Default is blank.
- Fetch Batch Size: Number of emails to be included in a single batch.
- On the Advanced tab, define the job execution schedule.
- Click Finish.
Adding incoming emails to the Conversations View through built-in command
To add incoming emails directly from an Email Listener to Conversations View in your workflow:
- Add a Built-In Command activity.
- In Category, select Case Operations.
- In Commands, select Create Incoming Email from Email Listener.
- Click Next.
- Click EmailListenerToIncomingEmail item.
- Clear IsNull check box.
- Expand EmailListenerToIncomingEmail item.
- Click the MailMessage parameter and assign Email Listener's email value.
For example, {ListenerName}.Email. - Click the WorkflowInstanceId parameter, and assign the master workflow value of the workflow where you want to display the email conversation item.
- Click the CreatedByUserId parameter, and assign a value to display the user who created the email conversation item.
- Click Finish.
To add incoming emails to Conversations View manually, you can use the Create Conversation Item built-in-command.
- Add a Built-In Command activity.
- Select Case Operations > Create Conversation Item.
- Click Next.
- Add the following command parameters:
- workflowInstanceId: the master or the sub workflow id.
- conversationItemState: should be Incoming, but can be any state.
For details, see this article. - ConversationItem: EmailConversationItem
- From
- To
- Cc
- Bcc
- Subject
- Priority: Sets the priority of the email conversation. Value can be High or Normal.
Available for V9.6 and later. - Content Type
- Body
Example: IIF({EmailListenerActivityName}.Email.HasBodyHtml, {EmailListenerActivityName }.Email.PreviewBodyHtml, {EmailListenerActivityName }.Email.BodyText) - Attachments
File name example: {Listener1}.Email.AllAttachments.Last().FileName
AllAttachments combines the email attachments and the msg/eml file that was created by the Email Listener.
- createdByUserId: the current user executing the built-in command.
- Click Finish.
IMPORTANT
Make sure you have Execute permissions in the master workflow.
Use Email Composer in Cora SeQuence forms
You can add Email Composer in your forms, in the following two ways:
- Add Conversations View control to get all the email functionalities.
For more details, see this article. - Manage the Email Composer controls independently, through Client API within the forms.
For details, see the section below.
Manage Email Composer through client API
- Add or edit a form or task activity in a workflow.
- Add the following script to the form source.
    <script type="text/javascript">
      function OnNewMailButtonClientClicking(sender, args) {
        var parameters = {
          wfId: '<%= { wf.WorkflowInstanceId } %>',
          windowTitle: 'New Message',
          from: "absd1@gmail.com,apgd@gmail.com",
          to: "john.smith@genpact.digital,mack.ben@pnmsoft.com",
          cc: "john.smith@genpact.digital,mack.ben@pnmsoft.com",
          bcc: '',
          template: 'SignatureTemplate',
          subject: 'Email Composer Subject',
          priority: 'high',
          signature: 'ben sign alias',
          body: 'Hello',
          //disabledFields: ['from', 'cc', 'bcc', 'template', 'subject','signature']
          disabledFields: ['signature']
        };
        var uniqueId = SEQComponents.Email.open(parameters);
        args.set_cancel(true);
      }


      function OnExistingMailButtonClientClicking(sender, args) {
        var parameters = {
          wfId: '<%= { wf.WorkflowInstanceId } %>',
          uniqueId: "F8C8FC17-86E4-40F9-85CC-C1555DA47A94"
        }
        SEQComponents.Email.open(parameters);
        args.set_cancel(true);
      }


      function OnReplyMailButtonClientClicking(sender, args) {
        var parameters = {
          wfId: '<%= { wf.WorkflowInstanceId } %>',
          replyToId: "18C01D1F-2947-4CDB-BE0E-3056598ECFFA"
        }
        SEQComponents.Email.open(parameters);
        args.set_cancel(true);
      }


      function OnForwardMailButtonClientClicking(sender, args) {
        var parameters = {
          wfId: '<%= { wf.WorkflowInstanceId } %>',
          forwardedFromId: "18C01D1F-2947-4CDB-BE0E-3056598ECFFA"
        }
        SEQComponents.Email.open(parameters);
        args.set_cancel(true);
      }
    </script>
Language support
Localization of Email conversation type is supported by default.
For details on multilingual configuration, see this article.
Conversation component is translated according to form's Globalization settings:
- if Localizable = False, use the Language activity definition
- if Localizable = True, use the user's language
NOTE
- Only workflows that are in context of a Solution support Email Composer.
- Conversations used in sub workflows can also work in the master workflow and will display the same conversation items.
For general client API information on all conversation items including Email Composer, see the Conversations View client API section in this article.
For Email Composer, you can use the following args object parameters:
| Parameter | Description |
|---|---|
| args.detail.parameters.windowTitle | Specifies the title of the Email Composer window. |
| args.detail.parameters.from | Specifies the list of email addresses a user can select from. This parameter overrides the pre-configured From email address. The first item is set as the default From address. |
| args.detail.parameters.template | Applies a selected template. |
| args.detail.parameters.signature | Applies a selected signature template. |
| args.detail.parameters.to | Adds a list of To addresses. |
| args.detail.parameters.cc | Adds a list of Cc addresses. |
| args.detail.parameters.bcc | Adds a list of Bcc addresses. |
| args.detail.parameters.subject | Specifies the email subject. The subject is overwritten if an email template is set. |
| args.detail.parameters.body | Specifies the email body. The body is overwritten if a template is set. |
| args.detail.parameters.priority | Sets the email priority. |
NOTE
In the From, To, Cc, and Bcc lists, use a comma ‘,’ to separate between items.
Configure state triggered workflows
You can configure the system to initiate a specific workflow and perform an action when a conversation item changes to a specific status.
For details, see this article.
V9.7 and V10.4.x
Overview
Email conversation is a type of case-related conversation supported in Cora SeQuence. You can enable and configure the Email conversation type for a Solution, which allows users to compose and send ad-hoc emails from within the forms, and display case-related incoming and outgoing emails.
You can use the Email Composer as a stand-alone component embedded in a form, or use the Email conversation type as part of the Conversations View component in a Solution.
With this release, the Email conversation item is available out-of-the-box with the Conversations View.
The To, Cc, and Bcc fields in the email composer display names of the recipients, and the users can add new email addresses to the address book in the system using the To, Cc, and Bcc fields in the email composer.
Configure email conversation type through the Conversations View
- In the Administration site, open the Solution from the list.
- In the Solution Components section, click Conversations View.
- In the Conversation View window:
- Select the Email conversation type to enable for the Solution.
- Add status change handlers for event handling.
For details, see the Configure conversation item events for the event handling section in this article below. - Add Email Settings.
Configure email conversation type through the Email Composer
NOTE
Email Composer is not available out-of-the-box so you need to enable this for a solution first.
- In the Administration site, click and open a Solution from list.
- In the Solution Components section, click Email Composer.
- In the Email Composer window:
- Add a valid default "Address - From" email address.
This address is used when no From address(es) is provided while calling the Email Composer. An invalid address displays an error. - Add valid "Addresses - To" email address(es) for recipients' auto complete selection.
This list is used for the To, Cc, and Bcc fields and is managed and displayed as a grid where you can add, edit or delete email addresses. - Add "Email Templates".
These templates help user standardize an email format and are created as a Cora SeQuence expression.
You can also edit and delete existing templates.
You need to have the master workflow configured to use its properties like activities, variables, and metadata in the message body and subject. The workflow properties are displayed on the right panel. - Add "Email Signatures".
These signatures help user standardize an email signature.
You can also edit and delete existing email signatures.
- Add a valid default "Address - From" email address.
IMPORTANT
As a developer, make sure no part of the expression fails in runtime. This leads the entire expression to fail, and send a corrupt email with no subject and/or email body.
It is advisable to use If and Try functions as much as possible.
Configure Email Sender job
With Email Composer, you need to configure a JES job to send emails. The emails are sent asynchronously.
- Go to, Administration > Global Settings > Jobs Management, and click Add Job.
- Select Email Sender as the job type.
- Click Create.
- Edit the Job tab, as required.
- On the Command tab, add:
- Fetch Batch Size: Number of emails to be included in a single batch.
The batch includes emails in the "InQueue" state, or in the "Sending" state for longer than Abandoned Timeout. - Abandoned Timeout: Time to allow a conversation item to remain in the "Sending" state before it is considered as "abandoned", and ready to be fetched again by the job.
- Polling Interval: Time to wait between each database query to fetch conversation items with the "InQueue" state and abandoned emails.
- SMTP Connection Name: Name of the SMTP connection to use. It is defined in the General tables > SMTP connections. (for versions previous to V9.8.3.)
OR
Email Sending Connection Name: Name of the connection to use for email sending. (for V9.8.3 and later.) - Max. Retry Count: Number of retries to run before abandoning the batch and failing the job.
- Max Retry Interval: Time to wait between consecutive retries of the same email.
- Email TTL: Time for an email conversation item to stay in the "InQueue" state before moving to the "Sending" state.
- Fetch Batch Size: Number of emails to be included in a single batch.
- On the Advanced tab, define the job execution schedule.
- Click Finish.
Adding incoming emails to the Conversations View through built-in command
To add incoming emails directly from an Email Listener to Conversations View in your workflow:
- Add a Built-In Command activity.
- In Category, select Case Operations.
- In Commands, select Create Incoming Email from Email Listener.
- Click Next.
- Click EmailListenerToIncomingEmail item.
- Clear IsNull check box.
- Expand EmailListenerToIncomingEmail item.
- Click the MailMessage parameter and assign Email Listener's email value.
For example, {ListenerName}.Email. - Click the WorkflowInstanceId parameter, and assign the master workflow value of the workflow where you want to display the email conversation item.
- Click the CreatedByUserId parameter, and assign a value to display the user who created the email conversation item.
- Click Finish.
To add incoming emails to Conversations View manually, you can use the Create Conversation Item built-in-command.
- Add a Built-In Command activity.
- Select Case Operations > Create Conversation Item.
- Click Next.
- Add the following command parameters:
- workflowInstanceId: the master or the sub workflow id.
- conversationItemState: should be Incoming, but can be any state.
For details, see this article. - ConversationItem: EmailConversationItem
- From
- To
- Cc
- Bcc
- Subject
- Priority: Sets the priority of the email conversation. Value can be High or Normal.
Available for V9.6 and later. - Content Type
- Body
Example: IIF({EmailListenerActivityName}.Email.HasBodyHtml, {EmailListenerActivityName }.Email.PreviewBodyHtml, {EmailListenerActivityName }.Email.BodyText) - Attachments
File name example: {Listener1}.Email.AllAttachments.Last().FileName
AllAttachments combines the email attachments and the msg/eml file that was created by the Email Listener.
- createdByUserId: the current user executing the built-in command.
- Click Finish.
IMPORTANT
Make sure you have Execute permissions in the master workflow.
Use Email Composer in Cora SeQuence forms
You can add Email Composer in your forms, in the following two ways:
- Add Conversations View control to get all the email functionalities.
For more details, see this article. - Manage the Email Composer controls independently, through Client API within the forms.
For details, see the section below.
Manage Email Composer through client API
- Add or edit a form or task activity in a workflow.
- Add the following script to the form source.
    <script type="text/javascript">
      function OnNewMailButtonClientClicking(sender, args) {
        var parameters = {
          wfId: '<%= { wf.WorkflowInstanceId } %>',
          windowTitle: 'New Message',
          from: "absd1@gmail.com,apgd@gmail.com",
          to: "john.smith@genpact.digital,mack.ben@pnmsoft.com",
          cc: "john.smith@genpact.digital,mack.ben@pnmsoft.com",
          bcc: '',
          template: 'SignatureTemplate',
          subject: 'Email Composer Subject',
          priority: 'high',
          signature: 'ben sign alias',
          body: 'Hello',
          //disabledFields: ['from', 'cc', 'bcc', 'template', 'subject','signature']
          disabledFields: ['signature']
        };
        var uniqueId = SEQComponents.Email.open(parameters);
        args.set_cancel(true);
      }


      function OnExistingMailButtonClientClicking(sender, args) {
        var parameters = {
          wfId: '<%= { wf.WorkflowInstanceId } %>',
          uniqueId: "F8C8FC17-86E4-40F9-85CC-C1555DA47A94"
        }
        SEQComponents.Email.open(parameters);
        args.set_cancel(true);
      }


      function OnReplyMailButtonClientClicking(sender, args) {
        var parameters = {
          wfId: '<%= { wf.WorkflowInstanceId } %>',
          replyToId: "18C01D1F-2947-4CDB-BE0E-3056598ECFFA"
        }
        SEQComponents.Email.open(parameters);
        args.set_cancel(true);
      }


      function OnForwardMailButtonClientClicking(sender, args) {
        var parameters = {
          wfId: '<%= { wf.WorkflowInstanceId } %>',
          forwardedFromId: "18C01D1F-2947-4CDB-BE0E-3056598ECFFA"
        }
        SEQComponents.Email.open(parameters);
        args.set_cancel(true);
      }
    </script>
Language support
Localization of Email conversation type is supported by default.
For details on multilingual configuration, see this article.
Conversation component is translated according to form's Globalization settings:
- if Localizable = False, use the Language activity definition
- if Localizable = True, use the user's language
NOTE
- Only workflows that are in context of a Solution support Email Composer.
- Conversations used in sub workflows can also work in the master workflow and will display the same conversation items.
For general client API information on all conversation items including Email Composer, see the Conversations View client API section in this article.
For Email Composer, you can use the following args object parameters:
| Parameter | Description |
|---|---|
| args.detail.parameters.windowTitle | Specifies the title of the Email Composer window. |
| args.detail.parameters.from | Specifies the list of email addresses a user can select from. This parameter overrides the pre-configured From email address. The first item is set as the default From address. |
| args.detail.parameters.template | Applies a selected template. |
| args.detail.parameters.signature | Applies a selected signature template. |
| args.detail.parameters.to | Adds a list of To addresses. |
| args.detail.parameters.cc | Adds a list of Cc addresses. |
| args.detail.parameters.bcc | Adds a list of Bcc addresses. |
| args.detail.parameters.subject | Specifies the email subject. The subject is overwritten if an email template is set. |
| args.detail.parameters.body | Specifies the email body. The body is overwritten if a template is set. |
| args.detail.parameters.priority | Sets the email priority. |
NOTE
In the From, To, Cc, and Bcc lists, use a comma ‘,’ to separate between items.
Configure state triggered workflows
You can configure the system to initiate a specific workflow and perform an action when a conversation item changes to a specific status.
For details, see this article.
V9.5
Overview
Email conversation is a type of case-related conversation supported in Cora SeQuence. You can enable and configure the Email Composer component for a Solution, which when added to a workflow instance, allows users to compose and send ad-hoc emails from within the forms.
You can use the Email Composer as a stand-alone component embedded in a form, or couple it with the Conversations View component in a Solution.
The Email Composer component coupled with Conversations View, helps display case-related incoming and outgoing emails.
Configure Email Composer
- In the Administration site, click and open a Solution from list.
- In the Solution Components section, click Email Composer.
- In the Email Composer window:
- Add a valid default "Address - From" email address.
This address is used when no From address(es) is provided while calling the Email Composer. An invalid address displays an error. - Add valid "Addresses - To" email address(es) for recipients' auto complete selection.
This list is used for the To, Cc, and Bcc fields and is managed and displayed as a grid where you can add, edit or delete email addresses. - Add "Email Templates".
These templates help user standardize an email format and are created as a Cora SeQuence expression.
You can also edit and delete existing templates.
You need to have the master workflow configured to use its properties like activities, variables, and metadata in the message body and subject. The workflow properties are displayed on the right panel. - Add "Email Signatures".
These signatures help user standardize an email signature.
You can also edit and delete existing email signatures.
- Add a valid default "Address - From" email address.
IMPORTANT
As a developer, make sure no part of the expression fails in runtime. This leads the entire expression to fail, and send a corrupt email with no subject and/or email body.
It is advisable to use If and Try functions as much as possible.
Configure Email Sender job
With Email Composer, you need to configure a JES job to send emails. The emails are sent asynchronously.
- Go to, Administration > Global Settings > Jobs Management, and click Add Job.
- Select Email Sender as the job type.
- Click Create.
- Edit the Job tab, as required.
- On the Command tab, add:
- Fetch Batch Size: Number of emails to be included in a single batch.
The batch includes emails in the "InQueue" state, or in the "Sending" state for longer than Abandoned Timeout. - Abandoned Timeout: Time to allow a conversation item to remain in the "Sending" state before it is considered as "abandoned", and ready to be fetched again by the job.
- Polling Interval: Time to wait between each database query to fetch conversation items with the "InQueue" state and abandoned emails.
- SMTP Connection Name: Name of the SMTP connection to use. It is defined in the General tables > SMTP connections.
- Max. Retry Count: Number of retries to run before abandoning the batch and failing the job.
- Max Retry Interval: Time to wait between consecutive retries of the same email.
- Email TTL: Time for an email conversation item to stay in the "InQueue" state before moving to the "Sending" state.
- Fetch Batch Size: Number of emails to be included in a single batch.
- On the Advanced tab, define the job execution schedule.
- Click Finish.
Adding incoming emails to the Conversation View through built-in command
To add incoming emails directly from an Email Listener to Conversations View in your workflow:
- Add a Built-In Command activity.
- In Category, select Case Operations.
- In Commands, select Create Incoming Email from Email Listener.
- Click Next.
- Click EmailListenerToIncomingEmail item.
- Clear IsNull check box.
- Expand EmailListenerToIncomingEmail item.
- Click the MailMessage parameter and assign Email Listener's email value.
For example, {ListenerName}.Email. - Click the WorkflowInstanceId parameter, and assign the master workflow value of the workflow where you want to display the email conversation item.
- Click the CreatedByUserId parameter, and assign a value to display the user who created the email conversation item.
- Click Finish.
To add incoming emails to Conversations View manually, you can use the Create Conversation Item built-in-command.
- Add a Built-In Command activity.
- Select Case Operations > Create Conversation Item.
- Add the following:
- workflowInstanceId
- conversationItemState: should be Incoming, but can be any state.
- createdByUserId
- Select the type as Email Conversation Item, and add the following command parameters:
- From
- To
- CC
- BCC
- Subject
- Priority: Sets the priority of the email conversation.
Example: EmailConversationItemPriority Priority = "High"NOTE
Available for V9.6 and later. - Body
Example: IIF({EmailListenerActivityName}.Email.HasBodyHtml, {EmailListenerActivityName }.Email.PreviewBodyHtml, {EmailListenerActivityName }.Email.BodyText) - Attachments
File name example: {Listener1}.Email.AllAttachments.Last().FileName
AllAttachments combines the email attachments and the msg/eml file that was created by the Email Listener.
IMPORTANT
Make sure you have Execute permissions in the master workflow.
Use Email Composer in Cora SeQuence forms
You can add Email Composer in your forms, in the following two ways:
- Add Conversations View control to get all the email functionalities.
For more details, see this article. - Manage the Email Composer controls independently, through Client API within the forms.
For details, see the section below.
Manage Email Composer through client API
- Add or edit a form or task activity in a workflow.
- Add the following script to the form source.
    <script type="text/javascript">
      function OnNewMailButtonClientClicking(sender, args) {
        var parameters = {
          wfId: '<%= { wf.WorkflowInstanceId } %>',
          windowTitle: 'New Message',
          from: "absd1@gmail.com,apgd@gmail.com",
          to: "john.smith@genpact.digital,mack.ben@pnmsoft.com",
          cc: "john.smith@genpact.digital,mack.ben@pnmsoft.com",
          bcc: '',
          template: 'SignatureTemplate',
          subject: 'Email Composer Subject',
          priority: 'high',
          signature: 'ben sign alias',
          body: 'Hello',
          //disabledFields: ['from', 'cc', 'bcc', 'template', 'subject','signature']
          disabledFields: ['signature']
        };
        var uniqueId = SEQComponents.Email.open(parameters);
        args.set_cancel(true);
      }


      function OnExistingMailButtonClientClicking(sender, args) {
        var parameters = {
          wfId: '<%= { wf.WorkflowInstanceId } %>',
          uniqueId: "F8C8FC17-86E4-40F9-85CC-C1555DA47A94"
        }
        SEQComponents.Email.open(parameters);
        args.set_cancel(true);
      }


      function OnReplyMailButtonClientClicking(sender, args) {
        var parameters = {
          wfId: '<%= { wf.WorkflowInstanceId } %>',
          replyToId: "18C01D1F-2947-4CDB-BE0E-3056598ECFFA"
        }
        SEQComponents.Email.open(parameters);
        args.set_cancel(true);
      }


      function OnForwardMailButtonClientClicking(sender, args) {
        var parameters = {
          wfId: '<%= { wf.WorkflowInstanceId } %>',
          forwardedFromId: "18C01D1F-2947-4CDB-BE0E-3056598ECFFA"
        }
        SEQComponents.Email.open(parameters);
        args.set_cancel(true);
      }
    </script>
Language support
Localization of Email conversation type is supported by default.
For details on multilingual configuration, see this article.
Conversation component is translated according to form's Globalization settings:
- if Localizable = False, use the Language activity definition
- if Localizable = True, use the user's language
NOTE
- Only workflows that are in context of a Solution support Email Composer.
- Conversations used in sub workflows can also work in the master workflow and will display the same conversation items.
For general client API information on all conversation items including Email Composer, see the Conversations View client API section in this article.
For Email Composer, you can use the following args object parameters:
| Parameter | Description |
|---|---|
| args.detail.parameters.windowTitle | Specifies the title of the Email Composer window. |
| args.detail.parameters.from | Specifies the list of email addresses a user can select from. This parameter overrides the pre-configured From email address. The first item is set as the default From address. |
| args.detail.parameters.template | Applies a selected template. |
| args.detail.parameters.signature | Applies a selected signature template. |
| args.detail.parameters.to | Adds a list of To addresses. |
| args.detail.parameters.cc | Adds a list of Cc addresses. |
| args.detail.parameters.bcc | Adds a list of Bcc addresses. |
| args.detail.parameters.subject | Specifies the email subject. The subject is overwritten if an email template is set. |
| args.detail.parameters.body | Specifies the email body. The body is overwritten if a template is set. |
| args.detail.parameters.priority | Sets the email priority. |
NOTE
In the From, To, Cc, and Bcc lists, use a comma ‘,’ to separate between items.
Available email states
| State | Cause |
|---|---|
| Draft | When a user saves an email. |
| InQueue | When a user sends a draft or an undelivered email. |
| Sending | When an Email Sender job fetches the email batch and tries to send them to the email server. |
| Sent | When the Email Sender job succeeds to send an email. |
| Undelivered | When the Email Sender job fails to send an email and has received an error on the email message level. |
| Incoming | When an email is received in the system. Make sure to update through built-in-command. |
V9.4.1
Overview
Email Conversation type is a part of reusable components added to Cora SeQuence. The Email Conversation type uses the Email Composer to allow users compose and send ad-hoc emails from within the forms. Email Composer component in the Conversations View component helps display the incoming and outgoing emails.
You can use the Email Composer as a stand-alone component embedded in a form, or can couple it with the Conversations View component in a Solution.
Configure Email Composer
- In the Administration site, click and open a Solution from the list.
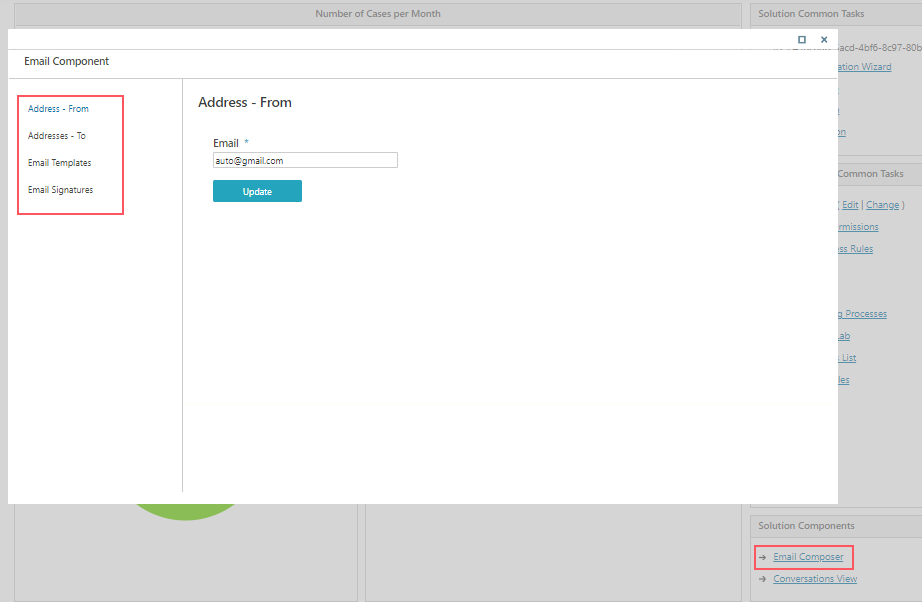
- In the Solution Components section, click Email Composer.
- In the Email Component window,
- Add a valid default "Address - From" email address.
This address is used when no From address(es) are provided while calling the Email Composer. An invalid address displays an error. - Add valid "Addresses - To" email address(es) for recipients' auto complete selection.
This list is used for the To, Cc, and Bcc fields, and is managed and displayed as a grid where you can add, edit or delete email addresses. - Add, edit or delete email templates.
These templates help user standardize an email format, and are created as a Cora SeQuence expression.
You need to have the master workflow configured to use its properties like activities, variables, and metadata in the message body and subject. The workflow properties are displayed on the right panel. - Add, edit or delete email signatures.
These signatures help user standardize an email signature.
- Add a valid default "Address - From" email address.
IMPORTANT
As a developer, make sure no part of the expression fails in runtime. This will lead the entire expression to fail, and send a corrupt email with no subject and/or email body.
It is advisable to use if and try functions as much as possible.
Configure Email Sender job
With Email Composer, you need to configure a JES job to send emails. The emails are sent asynchronously.
- Go to, Administration > Global Settings > Jobs Management, and click Add Job.
- Select Email Sender as job type.
- Click Create.
- Edit the Job tab, as required.
- On the Command tab, add:
- Fetch Batch Size: Number of emails to be included in single batch.
Batch includes emails in "InQueue" state, or in "Sending" state for longer than Abandoned Timeout. - Abandoned Timeout: Time to allow a conversation item to remain in "Sending" state before it is considered as "abandoned", and ready to be fetched again.
- Polling Interval: Time to wait between each database query to fetch conversation items with "InQueue" state and abandoned emails.
- SMTP Connection Name: Name of the SMTP connection to use. It is defined in the General tables > SMTP connections.
- Max. Retry Count: Number of retries to run before abandoning the batch and failing the job.
- Max Retry Interval: Time to wait between consecutive retries of the same email.
- Email TTL: Time for an email conversation item to stay in the "InQueue" state.
- Fetch Batch Size: Number of emails to be included in single batch.
- On the Advanced tab, define the job execution schedule.
- Click Finish.
Adding incoming emails to the Conversation View through built-in command
You can use the Create Conversation Item built-in-command to insert incoming emails into the Conversations View.
- Add a Built-In Command activity.
- Select Conversation Operations > Create Conversation Item.
- Add the following:
- workflowInstanceId
- conversationItemState: should be Incoming, but can be any state.
- createdByUserId
- Select the type as Email Conversation Item, and add the following command parameters:
- From
- To
- CC
- BCC
- Subject
- Body
Example: IIF({EmailListenerActivityName}.Email.HasBodyHtml, {EmailListenerActivityName }.Email.PreviewBodyHtml, {EmailListenerActivityName }.Email.BodyText) - Attachments
File name example: {Listener1}.Email.AllAttachments.Last().FileName
AllAttachments combines the email attachments and the msg/eml file that was created by the Email Listener.
IMPORTANT
To execute built-in-command that writes into the Conversations View, make sure you have Execute permissions in the master workflow.
To use Conversations View in a sub-workflow, the WF instance Id parameter should be mapped to the master workflow instance Id.
Use Email Composer in Cora SeQuence forms
You can add Email Composer in your forms, in the following two ways:
- Add the Conversations View: With this you get all of the email functionalities.
For more details, see this article. - Manage the Email Composer controls independently, through Client API within the forms.
For details, see the section below.
Manage Email Composer through client API
- Add or edit a form or task activity in a workflow.
- Add the following script to the form source.
    <script type="text/javascript">
      function OnNewMailButtonClientClicking(sender, args) {
        var parameters = {
          wfId: '<%= { wf.WorkflowInstanceId } %>',
          windowTitle: 'New Message',
          from: "absd1@gmail.com,apgd@gmail.com",
          to: "john.smith@genpact.digital,mack.ben@pnmsoft.com",
          cc: "john.smith@genpact.digital,mack.ben@pnmsoft.com",
          bcc: '',
          template: 'SignatureTemplate',
          subject: 'Email Composer Subject',
          signature: 'ben sign alias',
          body: 'Hello',
          //disabledFields: ['from', 'cc', 'bcc', 'template', 'subject','signature']
          disabledFields: ['signature']
        };
        var uniqueId = SEQComponents.Email.open(parameters);
        args.set_cancel(true);
      }


      function OnExistingMailButtonClientClicking(sender, args) {
        var parameters = {
          wfId: '<%= { wf.WorkflowInstanceId } %>',
          uniqueId: "F8C8FC17-86E4-40F9-85CC-C1555DA47A94"
        }
        SEQComponents.Email.open(parameters);
        args.set_cancel(true);
      }


      function OnReplyMailButtonClientClicking(sender, args) {
        var parameters = {
          wfId: '<%= { wf.WorkflowInstanceId } %>',
          replyToId: "18C01D1F-2947-4CDB-BE0E-3056598ECFFA"
        }
        SEQComponents.Email.open(parameters);
        args.set_cancel(true);
      }


      function OnForwardMailButtonClientClicking(sender, args) {
        var parameters = {
          wfId: '<%= { wf.WorkflowInstanceId } %>',
          forwardedFromId: "18C01D1F-2947-4CDB-BE0E-3056598ECFFA"
        }
        SEQComponents.Email.open(parameters);
        args.set_cancel(true);
      }
    </script>
NOTE
Only the workflows that are in the context of a Solution support Email Composer.
For general client API information on all conversation items including Email Composer, see the Conversations View client API section in this article.
For Email Composer, you can use the following args object parameters:
- args.detail.parameters.windowTitle: Specifies the title of the Email Composer window.
- args.detail.parameters.from: Specifies the list of email addresses a user can select from. This parameter overrides the pre-configured From email address. The first item is set as the default From address.
- args.detail.parameters.template: Applies a selected template.
- args.detail.parameters.signature: Applies a selected signature template.
- args.detail.parameters.to: Adds a list of To addresses.
- args.detail.parameters.cc: Adds a list of Cc addresses.
- args.detail.parameters.bcc: Adds a list of Bcc addresses.
- args.detail.parameters.subject: Specifies the email subject. The subject is overwritten if an email template is set.
- args.detail.parameters.body: Specifies the email body. The body is overwritten if an template is set.
NOTE
The From, To, Cc, and Bcc lists should use a comma ‘,’ to separate between items.
Available email states
| State | Cause |
|---|---|
| Draft | When a user saves an email. |
| InQueue | When a user sends a draft or an undelivered email. |
| Sending | When an Email Sender job fetches the email batch and tries to send them to the email server. |
| Sent | When the Email Sender job succeeds to send an email. |
| Undelivered | When the Email Sender job fails to send an email and has received an error on email message level. |
| Incoming | When an email is received in the system. Make sure to update through built-in-command. |
V9.4
Overview
Email Conversation type is a part of the case management reusable components added to Cora SeQuence. The Email Conversation type uses the Email Component to allow composing and sending ad-hoc emails from within the forms, and the Conversation Component helps display the incoming and outgoing emails.
You can use the Email Composer as a stand-alone component embedded in a form, or can couple it with the Conversations View component in a Solution.
Configure Email Composer
- In the Administration site, click and open a Solution from the list.
- In the Solution Components section, click Email Component.
- In the Email Component window,
- Add a valid default "Address - From" email address.
This address is used when no From address(es) are provided while calling the Email Composer. An invalid address displays an error. - Add valid "Addresses - To" email address(es) for recipients' auto complete selection.
This list is used for the To, Cc, and Bcc fields, and is managed and displayed as a grid where you can add, edit or delete email addresses. - Add, edit or delete email templates.
These templates help user standardize an email format, and are created as a Cora SeQuence expression.
You need to have the master workflow configured to use its properties like activities, variables, and metadata in the message body and subject. The workflow properties are displayed on the right panel.
- Add a valid default "Address - From" email address.
IMPORTANT
As a developer, make sure no part of the expression fails in runtime. This will lead the entire expression to fail, and send a corrupt email with no subject and/or email body.
It is advisable to use if and try functions as much as possible.
Configure Email Sender job
With Email Composer, you need to configure a JES job to send emails asynchronously.
- Go to, Administration > Global Settings > Jobs Management, and click Add Job.
- Select Email Sender as job type.
- Click Create.
- Edit the Job tab, as required.
- On the Command tab, add:
- Fetch Batch Size: Number of emails to be included in single batch.
Batch includes emails in "InQueue" state, or in "Sending" state for longer than Abandoned Timeout. - Abandoned Timeout: Time to allow a conversation item to remain in "Sending" state before it is considered as "abandoned", and ready to be fetched again.
- Polling Interval: Time to wait between each database query to fetch conversation items with "InQueue" state and abandoned emails.
- SMTP Connection Name: Name of the SMTP connection to use. It is defined in the General tables > SMTP connections.
- Max. Retry Count: Number of retries to run before abandoning the batch and failing the job.
- Max Retry Interval: Time to wait between consecutive retries of the same email.
- Email TTL: Time for an email conversation item to stay in the "InQueue" state.
- Fetch Batch Size: Number of emails to be included in single batch.
- On the Advanced tab, define the job execution schedule.
- Click Finish.
Add Email Composer to Cora SeQuence forms
You can add Email Composer in your forms, in the following two ways:
- Add the Conversations View
With this you get all of the email functionalities. For more details, see this article. - Manage the Email Composer controls independently through Client API within the forms.
Manage Email Composer through client API
- Add or edit a form or task activity in a workflow.
- Add the following script to the form source.
<script type="text/javascript">
      function OnNewMailButtonClientClicking(sender, args) {
        var parameters = {
          wfId: '<%= { wf.WorkflowInstanceId } %>',
          title: 'New Message',
          from: "johnk@genpact.com;",
          to: "mark.smith@genpact.digital;john.smith@pnmsoft.com",
          cc: "jack.fellow@genpact.digital",
          bcc: '',
          template: 'rat',
          subject: 'Email Composer Subject',
          body: '',
          //disabledFields: ['from', 'to', 'cc', 'bcc', 'template', 'subject']
        };
        var messageId = SEQForms.EmailComposer.open(parameters);
        args.set_cancel(true);
      }
      function OnExistingMailButtonClientClicking(sender, args) {
        var parameters = {
          wfId: '<%= { wf.WorkflowInstanceId } %>',
          messageId: <Guid>,
          template: "rat"
        }
        SEQForms.EmailComposer.open(parameters);
        args.set_cancel(true);
      }
      function OnReplyMailButtonClientClicking(sender, args) {
        var parameters = {
          wfId: '<%= { wf.WorkflowInstanceId } %>',
          replyToId: <Guid>,
          subject: 'Email Composer Subject',
          template: 'rat'
        }
        SEQForms.EmailComposer.open(parameters);
        args.set_cancel(true);
      }
      function OnForwardMailButtonClientClicking(sender, args) {
        var parameters = {
          wfId: '<%= { wf.WorkflowInstanceId } %>',
          forwardToId: <Guid>
        }
        SEQForms.EmailComposer.open(parameters);
        args.set_cancel(true);
      }
    </script>
NOTE
Email Composer is supported only in workflows that are in the context of a Solution.
For general client API information on all conversation items including Email Composer, see the Conversations View client API section in this article.
For Email Composer, you can use the following args object parameters:
- args.detail.parameters.windowTitle: Specifies the title of the Email Composer window.
- args.detail.parameters.from: Specifies the list of email addresses a user can select from. This parameter overrides the pre-configured From email address. The first item is set as the default From address.
- args.detail.parameters.template: Applies a selected template.
- args.detail.parameters.to: Adds a list of To addresses.
- args.detail.parameters.cc: Adds a list of Cc addresses.
- args.detail.parameters.bcc: Adds a list of Bcc addresses.
- args.detail.parameters.subject: Specifies the email subject. The subject is overwritten if an email template is set.
- args.detail.parameters.body: Specifies the email body. The body is overwritten if an template is set.
NOTE
The From, To, Cc, and Bcc lists should use a comma ‘,’ to separate between items.
Adding incoming emails to the Conversation View through built-in command
You can use the Create Conversation Item built-in-command to insert incoming emails into the Conversations View.
- Add a Built-In-Command activity.
- Select the category as Conversation Operations and command as Create Conversation Item.
- Add:
- workflowInstanceId
- conversationItemState: should be Incoming, but can be any state.
- Select the type as Email Conversation Item, and add the following command parameters:
- From
- To
- CC
- BCC
- Subject
- Body
(example: IIF({EmailListenerActivityName}.Email.HasBodyHtml, {EmailListenerActivityName }.Email.PreviewBodyHtml, {EmailListenerActivityName }.Email.BodyText)) - Attachments
IMPORTANT
To execute built-in-command that write into the Conversations View, make sure you have Execute permissions in the master workflow.
Available email states
| State | Reason/Cause for the state |
|---|---|
| Draft | When a user saves an email. |
| InQueue | When a user send a draft or undelivered email. |
| Sending | When an Email Sender job fetches the email batch, and tries to send them to the email server. |
| Sent | When the Email Sender job succeeds to send an email. |
| Undelivered | When the Email Sender job fails to send an email, and received an error on email message level. |
| Incoming | When an email is received in the system Make sure to update through built-in-command |
