V9.2
You configure the Flowtime site to provide users with the smooth functionality and usability. You can customize the pages to comply with your organization's branding policies, add or edit existing pages, set up functionality that fit existing processes, and configure new menus and submenus.
Configuration files
After you install the Flowtime site, you can configure the following files:
| File type | Description | Location |
|---|---|---|
| web.config | Controls settings, such as culture, theme, and database connection. For example, you can set the Flowtime website language by editing the following key: <globalization culture="en-US" uiCulture="en-US" requestEncoding="utf-8" responseEncoding="utf-8" fileEncoding="utf-8" /> | Application root folder |
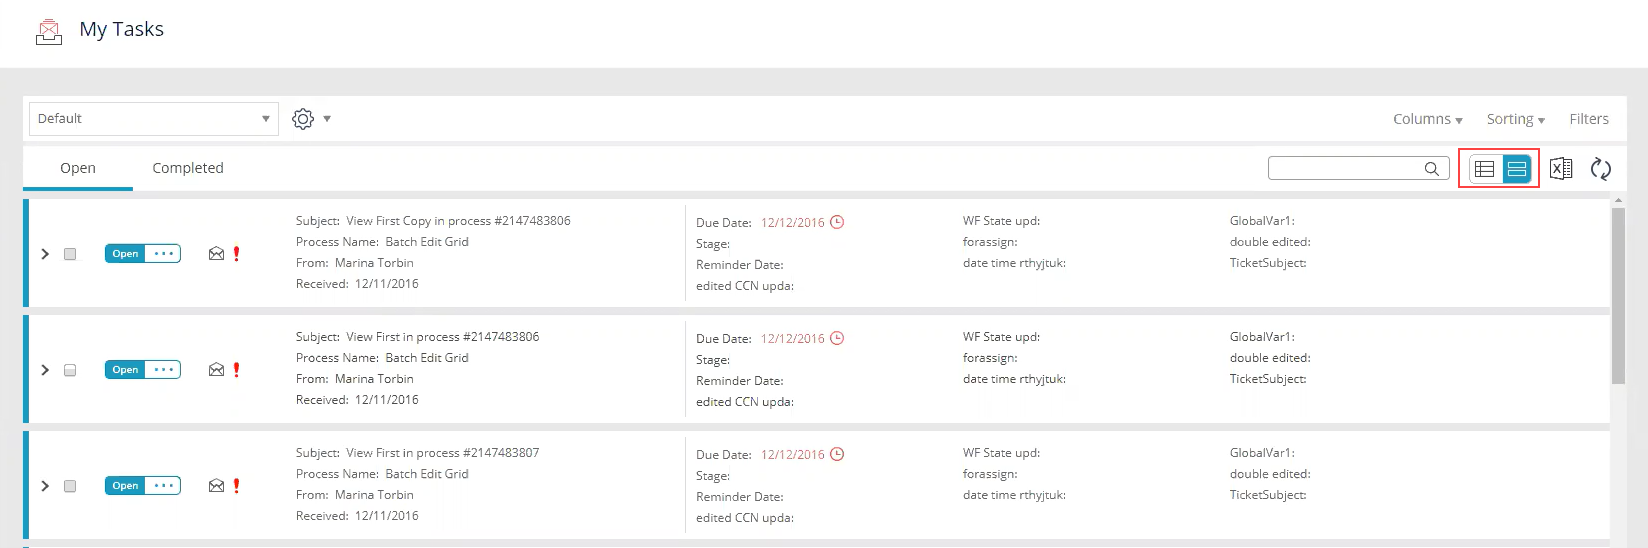
| ASPX | Define the appearance and functionality of each page in the Flowtime website. For example, the MyTasks.aspx file defines the Inbox page. | Application root folder |
| Control Template | The Flowtime website is assembled from pages that host the user controls. For example, UserMessagesGridControl.ascx is used to display the User Messages grid.Configuration example: View article on how to add the form viewer control to a Flowtime page. | [Site physical path]\_CONTROLTEMPLATES\Flowtime |
| Default.config | Defines the navigation menu links in the Flowtime website. You can edit links, set the URL of each link, and add links to new pages. | [Site physical path]\Shared Resources\Components\Flowtime\Config\Portal\Commands |
| ServiceMetada config | Set of config files that define the display of columns for each grid. For example, the setting for Messages grid columns is defined in the MessagesServiceMetadata.Portal.Config file. Files with the word Portal in the file name are the files that define grids in the Flowtime website. | [Site physical path]\Shared Resources\Components\Flowtime\Config\ServiceMetadata |
Add a new page
- Create an ASPX file in the site root folder.
- Rename the file using a meaningful name.
- Open and edit the file.
Example
In this example, we display the Group Messages Grid control and Form Viewer control on the new page MyPage.aspx. The Form Viewer control enables you to add any form view to a page without referencing a specific process. The sections we added are highlighted.
For the controls to work, you need to add a <Register> tag for each control on the page that you add. You can find these links in the Flowtime Application in the IIS.
IMPORTANT
If you add custom code to the page, set it to inherit the PortalBasePage class at PNMsoft.Sequence.Runtime.Web.UI.dll.
<%@ Page Title="" Language="C#" CodeBehind="Default.aspx.cs"
Inherits="PNMsoft.Sequence.Runtime.Web.UI.Pages.Default" AutoEventWireup="true"
%>
<%@ Register TagPrefix="sq" TagName="GroupMessagesGridControl"
 Src="~/_controltemplates/Flowtime/GroupMessagesGridControl.ascx" %>
 <%@ Register TagPrefix="sq" TagName="FormViewerControl"
 Src="~/_controltemplates/Flowtime/FormViewerControl.ascx" %>
<asp:Content ID="Content" ContentPlaceHolderID="content" runat="server">
    <div class="sqpt-container">

	  <div class="sqpt-grid-control">
 <sq:GroupMessagesGridControl ID="GroupMessagesGridControl"
PageSize="5" DisplayVariables="false"
 runat="server" />
 </div>

 <sq:FormViewerControl ID="ReportsView"
FormVirtualPath="~/SequenceForms/wf/Test/Test/Form1/DefaultView.ascx"
 runat="server" />
      </div>
</asp:Content>
Add a page that includes a dashboard
- Access the ASPX file that you created in the root folder.
- Add the following AnalyticsDashboardControl declaration.
<%@ Register TagPrefix="sq" TagName="AnalyticsDashboardControl"
 Src="~/_controltemplates/Flowtime/AnalyticsDashboardControl.ascx" %>
- Add the following markup to the page.
<asp:Content ID="Content" ContentPlaceHolderID="Content" runat="server"> <div class="sqpt-container"> <sq:AnalyticsDashboardControl runat="server" ID="AnalyticsDashboardControl" Transport="flowtime" ThemeName="Default" Mode="Auto"></sq:AnalyticsDashboardControl> </div> </asp:Content> - Configure the following properties.
Property Description DataStreamName Name of the dashboard suite you are using. Layout Name of the dashboard from the dashboard suite that you want to display Transport By default, the Transport is flowtime. Only advanced users should modify this property. - (Optional) Configure the follow properties as necessary.
Property Description ThemeName By default, ThemeName is Default. The other valid value is Compact. Mode By default, Mode is Auto. The other valid values are Fixed and Fluid. This affects the dashboard layout, whether it is fixed, fluid, or set automatically. - (Optional) Advanced users can configure the following properties as necessary.
Property Description Table Title Parameters Can include different context parameters, such as SolutionId of a HotOperations solution, and so on. For this to work, users should inherit the code-behind from specific classes. DataStreamsURL Points to the data stream's Web service.
The final ASPX file contains the following markup.
<asp:Content ID="Content" ContentPlaceHolderID="Content" runat="server">
    <div class="sqpt-container">
      <sq:AnalyticsDashboardControl runat="server" ID="AnalyticsDashboardControl"
Transport="flowtime" ThemeName="Default" Mode="Auto"></sq:AnalyticsDashboardControl>
    </div>
</asp:Content>
Change the workflow selection mode in the Process page
- In the Flowtime folder, go to \Shared Resources\Components\WorkflowExplorer\Config.
- Edit in Notepad++ the WorkflowExplorer.config file.
- Edit the following UI tag in the file:
<ui showSideBar="True" showTopBar="True" sideBarInitialState="expanded" stageBarLocation="Inline" commandsUI="CommandsUI.Default" />
- Add
workflowTreeSelectionMode="Last”parameter to the tag. - Save the file.
- Restart the IIS server.
CMD>iisreset
Add a link to navigation menu
In this example, you add a link to a custom My Tasks page.
- Open the
Default.configfile. - Under
<ControlTable> <Menu Id="Portal><Items>, add a new menu to the<MenuItem>section, as follows.<MenuItem Id="MyCustomTasksPage" Command="MyCustomTasksPage" Text="My Page" Tooltip="MY Page">
- Under
<CommandTable>, add a newNavigateToUrlCommandsection with the URL of the target page.<NavigateToUrlCommand Id="MyCustomTasksPage" Url="~/MyCustomTasksPage.aspx"> </NavigateToUrlCommand>
- Perform IIS Reset, and refresh the homepage.
Set an image for the menu item
Each menu item includes an image. You define the image attribute in the MenuItem section.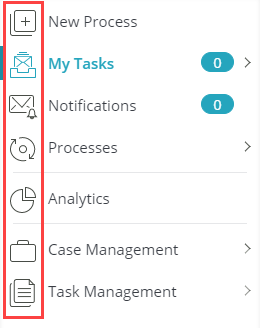
If you don't define a specific image, a default image is displayed next to the menu item.
You can use one of the following methods to define the menu item image property:
- A regular image path.
For example:Image="Flowtime/Images/Menu/Processes.png" - An icon ID taken from this list.
For example:Image="sqpi-Airplane"
Reorder menu items
You can change the order of the menu items, by adding the Sequence attribute.
<MenuItem
                 Id="Processes"
                 Text="{$resources.Processes}"
                 Tooltip="{$resources.Processes}"
                 Image="sqpi-Processes"
                 SubMenuId="Processes"
                 Sequence="1">
</MenuItem>
Add a submenu
The Flowtime site menu can include up to two menu levels.
In this example, you add two submenu items to the Processes menu item.
- Open the
Default.configfile. - In a new or existing
MenuItemsection, add the propertySubMenuId="Processes".
This setting links the submenu to the correct menu item.
<MenuItem
                 Id="Processes"
                 Text="{$resources.Processes}"
                 Tooltip="{$resources.Processes}"
                 Image="sqpi-Processes"
                 SubMenuId="Processes">
</MenuItem>- To define the submenu, add a new Menu tag that includes the new submenu items.
For example:
    <Menu Id="Processes">
      <Items>
        <MenuItem
                Id="ProcessesIStarted"
                Command="ProcessesIStartedCommand"
                Text="{$resources.ProcessesIStartedLower}"
                Tooltip="{$resources.ProcessesIStartedLower}">
        </MenuItem>
        <MenuItem
                 Id="ActiveProcesses"
                 Command="ActiveProcessesCommand"
                 Text="{$resources.ActiveProcesses}"
                 Tooltip="{$resources.ActiveProcesses}">
        </MenuItem>
      </Items>
    </Menu>
NOTE
Make sure that the command that you specify exists under the “CommandTable” tag.
- To highlight the selected submenu item, on the
MyTasks.aspxpage, add the following properties:MenuIdSelectedMenuItemId
Example
<%@ Page Title="My Tasks" ResourceTitle="MyTasks" IconId="sqpi-MyTasks" MenuId="Portal" SubMenuId="MyTasks" SelectedMenuItemId="ProcessesIStarted" SelectedSubMenuItemId="MyTasks"Resulting menu
Following the configuration described in the example above, the resulting submenu should look like this:

Edit an existing page
In this example, you add a new grid to the existing MyTasks page. You will name the grid MyCustomTasks page, and then replace the link in the navigation menu to the edited page.
- Make a copy of the page you want to edit in the root folder.
For example, copy theMyTasks.aspxfile to theMyCustomTasksPage.aspxfile. - Edit the file as necessary. In the example below, we added a new user control to the
MyTasks.aspxfile. The added sections are highlighted.<%@ Page Title="" Language="C#" MenuId="Portal" SelectedMenuItemId="MyPage" AutoEventWireup="false" CodeBehind="MyTasks.aspx.cs" Inherits="PNMsoft.Sequence.Runtime.Web.UI.Pages.MyTasks" %> <%@ Register TagPrefix="sq" TagName="UserMessagesGridControl" Src="~/_controltemplates/Flowtime/UserMessagesGridControl.ascx" %> <%@ Register TagPrefix="sq" TagName="GroupMessagesGridControl" Src="~/_controltemplates/Flowtime/GroupMessagesGridControl.ascx" %> <asp:Content ID="Content" ContentPlaceHolderID="content" runat="server"> <div class="sqpt-container"> <div class="sqpt-grid-control"> <sq:UserMessagesGridControl ID="UserMessagesGridControl" PageSize="30" DisplayVariables="true" ConfigName="Portal" runat="server" /> </div> <div class="sqpt-grid-control"> <sq:GroupMessagesGridControl ID="GroupMessagesGridControl" PageSize="5" DisplayVariables="false" runat="server" /> </div> </asp:Content>
- Replace the link on the navigation menu to direct to the new page that you have created.
- Open the
Default.configfile, which is located atC:\Program Files\PNMsoft\Shared Resources\Components\Flowtime\Config\Portal\Commands, and edit the<NavigateToUrlCommand> section as follows:<NavigateToUrlCommand Id="MyTasks" Url="~/MyCustomTasksPage.aspx"> </NavigateToUrlCommand>
Edit grid layout
The Layout property in the grid control of the ASPX file controls the column and table widths.
| Values | Description |
|---|---|
| Auto | Sets column width to fit the widest unbreakable content in the cells. This option can run slower than the Fixed option, because all content in the grid needs to be read before determining the final layout. |
| Fixed | Default value. The default column width is 130 pixels. You can overwrite the default width in the config file. Horizontal layout depends only on the table's width and the width of the columns, not the contents of the cells. The Fixed layout enables a browser to lay out the table faster than the automatic table layout. The browser can display the table after the first row is read. It is important to be aware of column widths configured with global and workflow variables. |
Edit grid scrollbar behavior
You use the Adaptive property in the grid control of the ASPX file to determine the grid's scroll bar.
By default, the Adaptive property is set to True, and the layout is set to Fixed.
| Values | Description |
|---|---|
| True | Default value. Both the header and the table content have their own HTML tables. |
| False | The grid does not have its own scroll bar (but the page is still scrollable). |
Edit grid height
You use the AdaptiveHeight property in the grid control of the ASPX file to determine the grid's height.
By default, the AdaptiveHeight property is set to -1.
| Value | Description |
|---|---|
| Number >0 | Set the height of the grid (numbers of pixels). |
| 0 | Grid height matches the pagesize property. |
| -1 | Grid height adapts to the size of the page window. >>>The grid auto-resizes with the page. This option is preferable for pages with a single grid. |
Customize column width
You can use the Width property in the specific grid's ServiceMetada config to control the width of several types of columns, such as DataBound columns and GlobalVariables columns.
For example, to define the width of the columns for local and global variables in the Process page grid, add the<workflowvariablescolumns> tag to the grid's ServiceMetadata.config file.
Make sure that you do not add both the <workflowvariablescolumns> and <globalvariablescolumns> tags.
Example
<workflowvariablescolumns>
  <ColumnTemplates>
<VariableDataBoundViewColumn
    DataField="Variable2Name" Width="200px"/>
  </ColumnTempates>
</workflowvariablescolumns>
Configure Tile display
The following grids support Tile Display:
- Flowtime
- My Tasks
- Notifications
- Hot Operations
- Team Member: Task List
- Team Leader: Task List
- Operations Manager: Case List
- Case Search
You can customize the layout of the collapsed and expanded views, by changing the number or columns and their width, and the number of rows per column. You can set up to 12 columns, depending on the width required for each column.
The order in which the data is distributed within the layout is determined by the grid's ServiceMetada config files. Users can also determine the order of the displayed data by reordering the columns in Flowtime.
Grid layout files
For the grids that support Tile display, you configure the layout by editing the following HTML files:
grid-tile.html: configure the layout of the collapsed tile.grid-expanded-tile.html: configure the layout of the expanded tile.
| Component | File location |
|---|---|
| Flowtime | [rootfolder]\Cora SeQuence\Flowtime\Shared Resources\Components\Flowtime\Templates\ProcessTasks |
| Hot Operations | [rootfolder]\Cora SeQuence\Flowtime\Shared Resources\Components\HotOperations\Flowtime\Templates\TeamMember[rootfolder]\Cora SeQuence\Flowtime\Shared Resources\Components\HotOperations\Flowtime\Templates\OpsManager[rootfolder]\Cora SeQuence\Flowtime\Shared Resources\Components\HotOperations\Flowtime\Templates\TeamLeader[rootfolder]\Cora SeQuence\Flowtime\Shared Resources\Components\HotOperations\Flowtime\Templates\SearchResults |
NOTE
As default files are overwritten with every upgrade, create a custom template based on the HTML files provided.
Tile display application variables
You can set up application variables to avoid losing any changes made to the tile display templates when the system is upgraded. Application variables are stored in the database and define the path of the tile display template.
| Component | Key | Value |
|---|---|---|
| Flowtime | Portal.Grid.TileTemplate.ProcessTasks | Path to the file location. For example, the path to the template of the Team Member grid:
|
Portal.Grid.ExpandedTileTemplate.ProcessTasks | ||
| Hot Operations | Portal.HotOperations.Grid.TileTemplate.OpsManager | |
Portal.HotOperations.Grid.ExpandedTileTemplate.OpsManager | ||
Portal.HotOperations.Grid.TileTemplate.TeamLeader | ||
Portal.HotOperations.Grid.ExpandedTileTemplate.TeamLeader | ||
Portal.HotOperations.Grid.TileTemplate.TeamMember | ||
Portal.HotOperations.Grid.ExpandedTileTemplate.TeamMember | ||
Portal.Grid.TileTemplate.SearchResults | ||
Portal.Grid.ExpandedTileTemplate.SearchResults |
Example of collapsed mode for the ProcessTasks grid
In the example, the first five columns of the tile include one row each with different widths, and then four columns with three rows each. The first column includes the "expand" arrow.
Where:
@t (key and value): represents a cell in the grid, that is, the value of the column with its caption.
sqf-col-xs-<integer>: defines the width of the column according to the grid system.
For information on how to customize grid layouts, see this article.
<div class="sqf-layout-fluid">
    <div class="sqf-container">
        <div class="sqf-row ft-flex">
<div class="sqf-col-xs-2 ft-flex ft-flex-v-center" style="flex: 0 0 260px;">
<div class="sqf-col-xs-1">
<div class="expand"></div>
</div>
<div class="sqf-col-xs-2">@t</div>
<div class="sqf-col-xs-5">@t</div>
<div class="sqf-col-xs-1">@t</div>
<div class="sqf-col-xs-1">@t</div>
<div class="sqf-col-xs-1">@t</div>
</div>
<div class="sqf-col-xs-3 ft-col-b-r">
                @t@t@t@t
</div>
<div class="sqf-col-xs-2">
                @t@t@t@t
</div>
<div class="sqf-col-xs-2">
                @t@t@t
</div>
<div class="sqf-col-xs-2">
                @t@t@t
</div>
        </div>
    </div>
</div>
Above collapsed tile layout looks as follows on Flowtime:
Example of expanded mode for the ProcessTasks grid
In the example, the expanded area of the tile layout include two columns, with the same width each.
Where:
i +=<integer>: determines the number of columns.
sqf-col-xs<integer>: defines the width of the column.
<div class="sqf-layout-fluid">
    <div class="sqf-container expanded">
        # for (i = count; i < cells.length; i += 2) { #
        <div class="sqf-row">
		<div class="sqf-col-xs-6">@t</div><div class="sqf-col-xs-6">@t</div>
        </div>
        # } #
    </div>
</div>
Rebranding the Flowtime website
Cora SeQuence V8.7 introduced a new Flowtime theme: Cora.
You can customize the Cora theme using two sets of variables: one that changes the look and feel of the Flowtime website and another that changes elements in task forms.
Among other things, you can edit the Flowtime design variables to change:
- Site's logo
- Font colors
- Background color, or add image as background
- Page icons
For more information, see the article Redesign Flowtime using variables.
Hot Operations
Menu item configuration
Hot Operations menu items display based on the user roles.
You set the Hot Operations display rules in the HotOperations.config file, under <MenuItem> <DisplayRules>.
| Setting | Description |
|---|---|
<ho:IsOpsManagerRule /> | Displays the relevant menu item to the Hot Operations Manager role. |
<ho:IsTeamLeaderRule /> | Displays the relevant menu item to the Hot Operations Team Leader role. |
Example
<MenuItem
              Id="CaseManagement"
              Text="Case Management"
              Tooltip="Case Management"
              Image="sqpi-CaseManagement"
              SubMenuId="HotOperationsManager">
          <DisplayRules>
               <ho:IsOpsManagerRule />
          </DisplayRules>
             </MenuItem>
Change your solutions' URL
You can set up an application variable to control the menu solutions displayed in the My Tasks submenu.
| Key | Description | Value |
|---|---|---|
Portal.HotOperations.TeamMember.DefaultPage | Determines the Team Member's default task list page of a solution under My Tasks. | URL |
Portal.HotOperations.TeamMember.SolutionsMenuId | Determines the menu to which the solutions' task list will be added. | Menu Id |
Hide the Process Tasks menu item
To hide the Process Tasks menu item from the My Tasks submenu, do the following:
- In the
HotOperations.configfile, remove the MyTasks menu item from TaskList menu.
Hot Operations notifications
Manual actions performed by the Team Leader and Hot Operations Manager are now displayed on a new notifications pop-up window. You can control whether notifications appear or not, and for how long they are displayed.
| Attribute | Description | Value |
|---|---|---|
DisplayItemsProgressBox | Determines whether or not the notification pop-up window displays when the user performs an action on the grid items. For example, Reassign or Reallocate. | True (default) False |
ItemsProgressBoxVisibilityDuration | Determines the duration, in seconds, the notification pop-up window is visible before it fades. | Numeric 10 (default) |
To set up the notifications pop-up window, edit the following files with the required attributes.
| File | Section | Attribute |
|---|---|---|
[Site physical path]\HotOperations\OpsManager\CasesList.aspx | <sq:TeamLeaderTasksGridControl> | DisplayItemsProgressBoxItemsProgressBoxVisibilityDuration |
[Site physical path]\HotOperations\OpsManager\AllocationBoard.aspx | <sq:TeamLeaderTasksGridControl> | |
[Site physical path]\HotOperations\TeamLeader\TasksList.aspx | <sq:TeamLeaderTasksGridControl> | |
[Site physical path]\HotOperations\TeamLeader\AssignmentBoard.aspx | <sq:TeamLeaderTasksGridControl> |
Example
 <div class="sqpt-container">
        <sq:TeamLeaderTasksGridControl ID="TeamLeaderTasksGridControl" runat="server" DisplayItemsProgressBox="True" ItemsProgressBoxVisibilityDuration="5" AssignedDynamicTasksViewType="All" DisplayVariables="true" PageSize="20" />
    </div>
Translate custom Flowtime components
- Add following attribute to the Flowtime web.config file:
<resources resXFilesLocation="Resources" externalGlobalResourceName="CustomResourceFileName" /> - Under Shared Resources/Resources/Sequence add translation files.
(CustomResourceFileName.resx or CustomResourceFileName.es.resx) - Use the following expression to get resource value:
{$resources.KeyName}
Example
        <MenuItem Id="CoraOpsProcessesIStarted"
            Command="CoraOpsProcessesIStartedCommand"
            Text="{$resources.CasesIStarted}"
            Tooltip="{$resources.CasesIStarted}"
            Image="sqpi-Processes">
        </MenuItem>
V9.1
You configure the Flowtime site to provide end users with the smooth functionality and usability. You can customize the pages to comply with your organization's branding policies, add or edit existing pages, set up functionality that fit existing processes, and configure new menus and submenus.
Configuration files
After you install the Flowtime site, you can configure the following files:
| File type | Description | Location |
|---|---|---|
| web.config | Controls settings, such as culture, theme, and database connection. For example, you can set the Flowtime website language by editing the following key: <globalization culture="en-US" uiCulture="en-US" requestEncoding="utf-8" responseEncoding="utf-8" fileEncoding="utf-8" /> | Application root folder |
| ASPX | Define the appearance and functionality of each page in the Flowtime website. For example, the MyTasks.aspx file defines the Inbox page. | Application root folder |
| Control Template | The Flowtime website is assembled from pages that host the user controls. For example, UserMessagesGridControl.ascx is used to display the User Messages grid.Configuration example: View article on how to add the form viewer control to a Flowtime page. | |
| Default.config | Defines the navigation menu links in the Flowtime website. You can edit links, set the URL of each link, and add links to new pages. | [Site physical path]\Shared Resources\Components\Flowtime\Config\Portal\Commands |
| ServiceMetada config | Set of config files that define the display of columns for each grid. For example, the setting for Messages grid columns is defined in the MessagesServiceMetadata.Portal.Config file. Files with the word Portal in the file name are the files that define grids in the Flowtime website. | |
Add a new page
- Create an ASPX file in the site root folder.
- Rename the file using a meaningful name.
- Open and edit the file.
Example
In this example, we display the Group Messages Grid control and Form Viewer control on the new page MyPage.aspx. The Form Viewer control enables you to add any form view to a page without referencing a specific process. The sections we added are highlighted.
For the controls to work, you need to add a <Register> tag for each control on the page that you add. You can find these links in the Flowtime Application in the IIS.
IMPORTANT
If you add custom code to the page, set it to inherit the PortalBasePage class at PNMsoft.Sequence.Runtime.Web.UI.dll.
<%@ Page Title="" Language="C#" CodeBehind="Default.aspx.cs"
Inherits="PNMsoft.Sequence.Runtime.Web.UI.Pages.Default" AutoEventWireup="true"
%>
<%@ Register TagPrefix="sq" TagName="GroupMessagesGridControl"
 Src="~/_controltemplates/Flowtime/GroupMessagesGridControl.ascx" %>
 <%@ Register TagPrefix="sq" TagName="FormViewerControl"
 Src="~/_controltemplates/Flowtime/FormViewerControl.ascx" %>
<asp:Content ID="Content" ContentPlaceHolderID="content" runat="server">
    <div class="sqpt-container">

	  <div class="sqpt-grid-control">
 <sq:GroupMessagesGridControl ID="GroupMessagesGridControl"
PageSize="5" DisplayVariables="false"
 runat="server" />
 </div>

 <sq:FormViewerControl ID="ReportsView"
FormVirtualPath="~/SequenceForms/wf/Test/Test/Form1/DefaultView.ascx"
 runat="server" />
      </div>
</asp:Content>
Add a page that includes a dashboard
- Access the ASPX file that you created in the root folder.
- Add the following AnalyticsDashboardControl declaration.
<%@ Register TagPrefix="sq" TagName="AnalyticsDashboardControl"
 Src="~/_controltemplates/Flowtime/AnalyticsDashboardControl.ascx" %>
- Add the following markup to the page.
<asp:Content ID="Content" ContentPlaceHolderID="Content" runat="server"> <div class="sqpt-container"> <sq:AnalyticsDashboardControl runat="server" ID="AnalyticsDashboardControl" Transport="flowtime" ThemeName="Default" Mode="Auto"></sq:AnalyticsDashboardControl> </div> </asp:Content> - Configure the following properties.
Property Description DataStreamName Name of the dashboard suite you are using. Layout Name of the dashboard from the dashboard suite that you want to display Transport By default, the Transport is flowtime. Only advanced users should modify this property. - (Optional) Configure the follow properties as necessary.
Property Description ThemeName By default, ThemeName is Default. The other valid value is Compact. Mode By default, Mode is Auto. The other valid values are Fixed and Fluid. This affects the dashboard layout, whether it is fixed, fluid, or set automatically. - (Optional) Advanced users can configure the following properties as necessary.
Property Description Table Title Parameters Can include different context parameters, such as SolutionId of a HotOperations solution, and so on. For this to work, users should inherit the code-behind from specific classes. DataStreamsURL Points to the data stream's Web service.
The final ASPX file contains the following markup.
<asp:Content ID="Content" ContentPlaceHolderID="Content" runat="server">
    <div class="sqpt-container">
      <sq:AnalyticsDashboardControl runat="server" ID="AnalyticsDashboardControl"
Transport="flowtime" ThemeName="Default" Mode="Auto"></sq:AnalyticsDashboardControl>
    </div>
</asp:Content>
Add a link to navigation menu
In this example, you add a link to a custom My Tasks page.
- Open the
Default.configfile. - Under
<ControlTable> <Menu Id="Portal><Items>, add a new menu to the<MenuItem>section, as follows.<MenuItem Id="MyCustomTasksPage" Command="MyCustomTasksPage" Text="My Page" Tooltip="MY Page">
- Under
<CommandTable>, add a newNavigateToUrlCommandsection with the URL of the target page.<NavigateToUrlCommand Id="MyCustomTasksPage" Url="~/MyCustomTasksPage.aspx"> </NavigateToUrlCommand>
- Perform IIS Reset, and refresh the homepage.
Set an image for the menu item
Each menu item includes an image. You define the image attribute in the MenuItem section.
If you don't define a specific image, a default image is displayed next to the menu item.
You can use one of the following methods to define the menu item image property:
- A regular image path.
For example:Image="Flowtime/Images/Menu/Processes.png" - An icon ID taken from this list.
For example:Image="sqpi-Airplane"
Reorder menu items
You can change the order of the menu items, by adding the Sequence attribute.
<MenuItem
                 Id="Processes"
                 Text="{$resources.Processes}"
                 Tooltip="{$resources.Processes}"
                 Image="sqpi-Processes"
                 SubMenuId="Processes"
                 Sequence="1">
</MenuItem>
Add a submenu
The Flowtime site menu can include up to two menu levels.
In this example, you add two submenu items to the Processes menu item.
- Open the
Default.configfile. - In a new or existing
MenuItemsection, add the propertySubMenuId="Processes".
This setting links the submenu to the correct menu item.
<MenuItem
                 Id="Processes"
                 Text="{$resources.Processes}"
                 Tooltip="{$resources.Processes}"
                 Image="sqpi-Processes"
                 SubMenuId="Processes">
</MenuItem>- To define the submenu, add a new Menu tag that includes the new submenu items.
For example:
    <Menu Id="Processes">
      <Items>
        <MenuItem
                Id="ProcessesIStarted"
                Command="ProcessesIStartedCommand"
                Text="{$resources.ProcessesIStartedLower}"
                Tooltip="{$resources.ProcessesIStartedLower}">
        </MenuItem>
        <MenuItem
                 Id="ActiveProcesses"
                 Command="ActiveProcessesCommand"
                 Text="{$resources.ActiveProcesses}"
                 Tooltip="{$resources.ActiveProcesses}">
        </MenuItem>
      </Items>
    </Menu>
NOTE
Make sure that the command that you specify exists under the “CommandTable” tag.
- To highlight the selected submenu item, on the
MyTasks.aspxpage, add the following properties:MenuIdSelectedMenuItemId
Example
<%@ Page Title="My Tasks" ResourceTitle="MyTasks" IconId="sqpi-MyTasks" MenuId="Portal" SubMenuId="MyTasks" SelectedMenuItemId="ProcessesIStarted" SelectedSubMenuItemId="MyTasks"Resulting menu
Following the configuration described in the example above, the resulting submenu should look like this:
Edit an existing page
In this example, you add a new grid to the existing MyTasks page. You will name the grid MyCustomTasks page, and then replace the link in the navigation menu to the edited page.
- Make a copy of the page you want to edit in the root folder.
For example, copy theMyTasks.aspxfile to theMyCustomTasksPage.aspxfile. - Edit the file as necessary. In the example below, we added a new user control to the
MyTasks.aspxfile. The added sections are highlighted.<%@ Page Title="" Language="C#" MenuId="Portal" SelectedMenuItemId="MyPage" AutoEventWireup="false" CodeBehind="MyTasks.aspx.cs" Inherits="PNMsoft.Sequence.Runtime.Web.UI.Pages.MyTasks" %> <%@ Register TagPrefix="sq" TagName="UserMessagesGridControl" Src="~/_controltemplates/Flowtime/UserMessagesGridControl.ascx" %> <%@ Register TagPrefix="sq" TagName="GroupMessagesGridControl" Src="~/_controltemplates/Flowtime/GroupMessagesGridControl.ascx" %> <asp:Content ID="Content" ContentPlaceHolderID="content" runat="server"> <div class="sqpt-container"> <div class="sqpt-grid-control"> <sq:UserMessagesGridControl ID="UserMessagesGridControl" PageSize="30" DisplayVariables="true" ConfigName="Portal" runat="server" /> </div> <div class="sqpt-grid-control"> <sq:GroupMessagesGridControl ID="GroupMessagesGridControl" PageSize="5" DisplayVariables="false" runat="server" /> </div> </asp:Content>
- Replace the link on the navigation menu to direct to the new page that you have created.
- Open the
Default.configfile, which is located atC:\Program Files\PNMsoft\Shared Resources\Components\Flowtime\Config\Portal\Commands, and edit the<NavigateToUrlCommand> section as follows:<NavigateToUrlCommand Id="MyTasks" Url="~/MyCustomTasksPage.aspx"> </NavigateToUrlCommand>
Edit grid layout
The Layout property in the grid control of the ASPX file controls the column and table widths.
| Values | Description |
|---|---|
| Auto | Sets column width to fit the widest unbreakable content in the cells. This option can run slower than the Fixed option, because all content in the grid needs to be read before determining the final layout. |
| Fixed | Default value. The default column width is 130 pixels. You can overwrite the default width in the config file. Horizontal layout depends only on the table's width and the width of the columns, not the contents of the cells. The Fixed layout enables a browser to lay out the table faster than the automatic table layout. The browser can display the table after the first row is read. It is important to be aware of column widths configured with global and workflow variables. |
Edit grid scrollbar behavior
You use the Adaptive property in the grid control of the ASPX file to determine the grid's scroll bar.
By default, the Adaptive property is set to True, and the layout is set to Fixed.
| Values | Description |
|---|---|
| True | Default value. Both the header and the table content have their own HTML tables. |
| False | The grid does not have its own scroll bar (but the page is still scrollable). |
Edit grid height
You use the AdaptiveHeight property in the grid control of the ASPX file to determine the grid's height.
By default, the AdaptiveHeight property is set to -1.
| Value | Description |
|---|---|
| Number >0 | Set the height of the grid (numbers of pixels). |
| 0 | Grid height matches the pagesize property. |
| -1 | Grid height adapts to the size of the page window. >>>The grid auto-resizes with the page. This option is preferable for pages with a single grid. |
Customize column width
You can use the Width property in the specific grid's ServiceMetada config to control the width of several types of columns, such as DataBound columns and GlobalVariables columns.
For example, to define the width of the columns for local and global variables in the Process page grid, add the<workflowvariablescolumns> tag to the grid's ServiceMetadata.config file.
Make sure that you do not add both the <workflowvariablescolumns> and <globalvariablescolumns> tags.
Example
<workflowvariablescolumns>
  <ColumnTemplates>
<VariableDataBoundViewColumn
    DataField="Variable2Name" Width="200px"/>
  </ColumnTempates>
</workflowvariablescolumns>
Rebranding the Flowtime website
Cora SeQuence V8.7 introduced a new Flowtime theme: Cora.
You can customize the Cora theme using two sets of variables: one that changes the look and feel of the Flowtime website and another that changes elements in task forms.
Among other things, you can edit the Flowtime design variables to change:
- Site's logo
- Font colors
- Background color, or add image as background
- Page icons
For more information, see the article Redesign Flowtime using variables.
Hot Operations
Menu item configuration
Hot Operations menu items display based on the user roles.
You set the Hot Operations display rules in the HotOperations.config file, under <MenuItem> <DisplayRules>.
| Setting | Description |
|---|---|
<ho:IsOpsManagerRule /> | Displays the relevant menu item to the Hot Operations Manager role. |
<ho:IsTeamLeaderRule /> | Displays the relevant menu item to the Hot Operations Team Leader role. |
Example
<MenuItem
              Id="CaseManagement"
              Text="Case Management"
              Tooltip="Case Management"
              Image="sqpi-CaseManagement"
              SubMenuId="HotOperationsManager">
          <DisplayRules>
               <ho:IsOpsManagerRule />
          </DisplayRules>
             </MenuItem>
Change your solutions' URL
You can set up an application variable to control the menu solutions displayed in the My Tasks submenu.
| Key | Description | Value |
|---|---|---|
| Portal.HotOperations.TeamMember.DefaultPage | Determines the Team Member's default task list page of a solution under My Tasks. | URL |
| Portal.HotOperations.TeamMember.SolutionsMenuId | Determines the menu to which the solutions' task list will be added. | Menu Id |
Hide the Process Tasks menu item
To hide the Process Tasks menu item from the My Tasks submenu, do the following:
- In the
HotOperations.configfile, remove the MyTasks menu item from TaskList menu.
Hot Operations notifications
Manual actions performed by the Team Leader and Hot Operations Manager are now displayed on a new notifications pop-up window. You can control whether notifications appear or not, and for how long they are displayed.
| Attribute | Description | Value |
|---|---|---|
DisplayItemsProgressBox | Determines whether or not the notification pop-up window displays when the user performs an action on the grid items. For example, Reassign or Reallocate. | True (default) False |
ItemsProgressBoxVisibilityDuration | Determines the duration, in seconds, the notification pop-up window is visible before it fades. | Numeric 10 (default) |
To set up the notifications pop-up window, edit the following files with the required attributes.
| File | Section | Attribute |
|---|---|---|
[Site physical path]\HotOperations\OpsManager\CasesList.aspx | <sq:TeamLeaderTasksGridControl> | DisplayItemsProgressBoxItemsProgressBoxVisibilityDuration |
[Site physical path]\HotOperations\OpsManager\AllocationBoard.aspx | <sq:TeamLeaderTasksGridControl> | |
[Site physical path]\HotOperations\TeamLeader\TasksList.aspx | <sq:TeamLeaderTasksGridControl> | |
[Site physical path]\HotOperations\TeamLeader\AssignmentBoard.aspx | <sq:TeamLeaderTasksGridControl> |
Example
 <div class="sqpt-container">
        <sq:TeamLeaderTasksGridControl ID="TeamLeaderTasksGridControl" runat="server" DisplayItemsProgressBox="True" ItemsProgressBoxVisibilityDuration="5" AssignedDynamicTasksViewType="All" DisplayVariables="true" PageSize="20" />
    </div>
V8.7
You configure the Flowtime website to provide end users with the smooth functionality and usability. You can customize the pages to comply with your organization's branding policies, add or edit existing pages, and set up functionality to fit existing processes.
Configuration files
After you install the Flowtime site, you can configure the following files:
| File type | Description | Location |
|---|---|---|
| web.config | Controls settings, such as culture, theme, and database connection. For example, you can set the Flowtime website language by editing the following key: <globalization culture="en-US" uiCulture="en-US" requestEncoding="utf-8" responseEncoding="utf-8" fileEncoding="utf-8" /> | Application root folder |
| ASPX | Define the appearance and functionality of each page in the Flowtime website. For example, the MyTasks.aspx file defines the Inbox page. | Application root folder |
| Control Template | The Flowtime website is assembled from pages that host the user controls. For example, UserMessagesGridControl.ascx is used to display the User Messages grid.Configuration example: View article on how to add the form viewer control to a Flowtime page. | {Site Physical Path}\CONTROLTEMPLATES\Flowtime |
| Default.config | Defines the navigation menu links in the Flowtime website. You can edit links, set the URL of each link, and add links to new pages. | C:\Program Files\PNMsoft\Shared Resources\Components\Flowtime\Config\Portal\Commands |
| ServiceMetada config | Set of config files that define the display of columns for each grid. For example, the setting for Messages grid columns is defined in the MessagesServiceMetadata.Portal.Config file. Files with the word Portal in the file name are the files that define grids in the Flowtime website. | C:\Program Files\PNMsoft\Shared Resources\Components\Flowtime\Config\ServiceMetadata |
Add a new page
- Create an ASPX file in the site root folder.
- Rename the file using a meaningful name.
- Open and edit the file.
Example
In this example, we display the Group Messages Grid control and Form Viewer control on the new page MyPage.aspx. The Form Viewer control enables you to add any form view to a page without referencing a specific process. The sections we added are highlighted.
For the controls to work, you need to add a <Register> tag for each control on the page that you add. You can find these links in the Flowtime Application in the IIS.
IMPORTANT
If you add custom code to the page, set it to inherit the PortalBasePage class at PNMsoft.Sequence.Runtime.Web.UI.dll.
<%@ Page Title="" Language="C#" CodeBehind="Default.aspx.cs"
Inherits="PNMsoft.Sequence.Runtime.Web.UI.Pages.Default" AutoEventWireup="true"
%>
<%@ Register TagPrefix="sq" TagName="GroupMessagesGridControl"
 Src="~/_controltemplates/Flowtime/GroupMessagesGridControl.ascx" %>
 <%@ Register TagPrefix="sq" TagName="FormViewerControl"
 Src="~/_controltemplates/Flowtime/FormViewerControl.ascx" %>
<asp:Content ID="Content" ContentPlaceHolderID="content" runat="server">
    <div class="sqpt-container">

	  <div class="sqpt-grid-control">
 <sq:GroupMessagesGridControl ID="GroupMessagesGridControl"
PageSize="5" DisplayVariables="false"
 runat="server" />
 </div>

 <sq:FormViewerControl ID="ReportsView"
FormVirtualPath="~/SequenceForms/wf/Test/Test/Form1/DefaultView.ascx"
 runat="server" />
      </div>
</asp:Content>
Add a page that includes a dashboard
- Access the ASPX file that you created in the root folder.
- Add the following AnalyticsDashboardControl declaration.
<%@ Register TagPrefix="sq" TagName="AnalyticsDashboardControl"
 Src="~/_controltemplates/Flowtime/AnalyticsDashboardControl.ascx" %>
- Add the following markup to the page.
<asp:Content ID="Content" ContentPlaceHolderID="Content" runat="server"> <div class="sqpt-container"> <sq:AnalyticsDashboardControl runat="server" ID="AnalyticsDashboardControl" Transport="flowtime" ThemeName="Default" Mode="Auto"></sq:AnalyticsDashboardControl> </div> </asp:Content> - Configure the following properties.
Property Description DataStreamName Name of the dashboard suite you are using. Layout Name of the dashboard from the dashboard suite that you want to display Transport By default, the Transport is flowtime. Only advanced users should modify this property. - (Optional) Configure the follow properties as necessary.
Property Description ThemeName By default, ThemeName is Default. The other valid value is Compact. Mode By default, Mode is Auto. The other valid values are Fixed and Fluid. This affects the dashboard layout, whether it is fixed, fluid, or set automatically. - (Optional) Advanced users can configure the following properties as necessary.
Property Description Table Title Parameters Can include different context parameters, such as SolutionId of a HotOperations solution, and so on. For this to work, users should inherit the code-behind from specific classes. DataStreamsURL Points to the data stream's Web service.
The final ASPX file contains the following markup.
<asp:Content ID="Content" ContentPlaceHolderID="Content" runat="server">
    <div class="sqpt-container">
      <sq:AnalyticsDashboardControl runat="server" ID="AnalyticsDashboardControl"
Transport="flowtime" ThemeName="Default" Mode="Auto"></sq:AnalyticsDashboardControl>
    </div>
</asp:Content>
Add a link to navigation menu
In this example, you add a link to a custom My Tasks page.
- Open the
Default.configfile. - Under
<ControlTable> <Menu Id="Portal><Items>, add a new menu to the<MenuItem>section, as follows.<MenuItem Id="MyCustomTasksPage" Command="MyCustomTasksPage" Text="My Page" Tooltip="MY Page"> </MenuItem>
- Under
<CommandTable>, add a new NavigateToUrlCommand section with the URL of the target page.<NavigateToUrlCommand Id="MyCustomTasksPage" Url="~/MyCustomTasksPage.aspx"> </NavigateToUrlCommand>
- Perform IIS Reset, and refresh the homepage.
Edit an existing page
In this example, you edit the existing MyTasks page to add a new grid, name it MyCustomTasks page, and then replace the link in the navigation menu to the edited page.
- Make a copy of the page you want to edit in the root folder. For example, copy the
MyTasks.aspxfile to theMyCustomTasksPage.aspxfile. - Edit the file as necessary. In the example below, we added a new user control to the
MyTasks.aspxfile. The added sections are highlighted.<%@ Page Title="" Language="C#" MenuId="Portal" SelectedMenuItemId="MyPage" AutoEventWireup="false" CodeBehind="MyTasks.aspx.cs" Inherits="PNMsoft.Sequence.Runtime.Web.UI.Pages.MyTasks" %> <%@ Register TagPrefix="sq" TagName="UserMessagesGridControl" Src="~/_controltemplates/Flowtime/UserMessagesGridControl.ascx" %> <%@ Register TagPrefix="sq" TagName="GroupMessagesGridControl" Src="~/_controltemplates/Flowtime/GroupMessagesGridControl.ascx" %> <asp:Content ID="Content" ContentPlaceHolderID="content" runat="server"> <div class="sqpt-container"> <div class="sqpt-grid-control"> <sq:UserMessagesGridControl ID="UserMessagesGridControl" PageSize="30" DisplayVariables="true" ConfigName="Portal" runat="server" /> </div> <div class="sqpt-grid-control"> <sq:GroupMessagesGridControl ID="GroupMessagesGridControl" PageSize="5" DisplayVariables="false" runat="server" /> </div> </asp:Content>
- Replace the link on the navigation menu to direct to the new page that you have created.
- Open the
Default.configfile, which is located atC:\Program Files\PNMsoft\Shared Resources\Components\Flowtime\Config\Portal\Commands, and edit the<NavigateToUrlCommand> section as follows:<NavigateToUrlCommand Id="MyTasks" Url="~/MyCustomTasksPage.aspx"> </NavigateToUrlCommand>
Edit grid layout
The Layout property in the grid control of the ASPX file controls the column and table widths.
| Values | Description |
|---|---|
| Auto | Sets column width to fit the widest unbreakable content in the cells. This option can run slower than the Fixed option, because all content in the grid needs to be read before determining the final layout. |
| Fixed | Default value. The default column width is 130 pixels. You can overwrite the default width in the config file. Horizontal layout depends only on the table's width and the width of the columns, not the contents of the cells. The Fixed layout enables a browser to lay out the table faster than the automatic table layout. The browser can display the table after the first row is read. It is important to be aware of column widths configured with global and workflow variables. |
Edit grid scrollbar behavior
You use the Adaptive property in the grid control of the ASPX file to determine the grid's scroll bar.
By default, the Adaptive property is set to True, and the layout is set to Fixed.
| Values | Description |
|---|---|
| True | Default value. Both the header and the table content have their own HTML tables. |
| False | The grid does not have its own scroll bar (but the page is still scrollable). |
Edit grid height
You use the AdaptiveHeight property in the grid control of the ASPX file to determine the grid's height.
By default, the AdaptiveHeight property is set to -1.
| Value | Description |
|---|---|
| Number >0 | Set the height of the grid (numbers of pixels). |
| 0 | Grid height matches the pagesize property. |
| -1 | Grid height adapts to the size of the page window. >>>The grid auto-resizes with the page. This option is preferable for pages with a single grid. |
Customize column width
You can use the Width property in the specific grid's ServiceMetada config to control the width of several types of columns, such as DataBound columns and GlobalVariables columns.
For example, to define the width of the columns for local and global variables in the Process page grid, add the<workflowvariablescolumns> tag to the grid's ServiceMetadata.config file.
Make sure that you do not add both the <workflowvariablescolumns> and <globalvariablescolumns> tags.
Example
<workflowvariablescolumns>
  <ColumnTemplates>
<VariableDataBoundViewColumn
    DataField="Variable2Name" Width="200px"/>
  </ColumnTempates>
</workflowvariablescolumns>
Rebranding the Flowtime website
Cora SeQuence V8.7 introduced a new Flowtime theme: Cora.
You can customize the Cora theme using two sets of variables: one that changes the look and feel of the Flowtime website and another that changes elements in task forms.
Among other things, you can edit the Flowtime design variables to change:
- Site's logo
- Font colors
- Background color, or add image as background
- Page icons
For more information, see the article Redesign Flowtime using variables.
V8.6
The Flowtime website enables you to provide Flowtime experience and functionality to end users without having to install SharePoint. It provides the option to add and edit pages quite easily, and because it's a website, there is no need to compile.
Understanding File Structure
After you install Flowtime website, there are several files you can modify that enable you to configure and edit the Flowtime website.
Flowtime website files
- web.config
- ASPX
- Control Template
- Default.config
- ServiceMetada config
web.config files
Allows you to control Flowtime website settings, such as culture, theme, database connection, and so on.
For example, you can set the Flowtime website language by editing the following key:<globalization culture="en-US" uiCulture="en-US" requestEncoding="utf-8" responseEncoding="utf-8" fileEncoding="utf-8" />
ASPX files
These files define the appearance and functionality of each page on the Flowtime website. For example, the Inbox.aspx file defines the Inbox page.
Control Template files
The Flowtime website is assembled from pages that host the user controls. For example, UserMessagesGridControl.ascx is used to display the User Messages grid.
File Location: {Site Physical Path}\CONTROLTEMPLATES\Flowtime
Default.config file
This file defines the top menu links in the Flowtime website. Here you can edit links, set the URL of each link, and add links to new pages.
File Location: C:\Program Files\PNMsoft\Shared Resources\Components\Flowtime\Config\Portal\Commands
ServiceMetadata config files
This set of config files define the way columns display for each grid. For example, the setting for Messages grid coloumns is defined in the MessagesServiceMetadata.Portal.Config file. Files with the word Portal in the file name are the files that define grids in the Flowtime website.
File Location: C:\Program Files\PNMsoft\Shared Resources\Components\Flowtime\Config\ServiceMetadata
Edit the Flowtime Website
You can easily add pages, edit pages, and make other appearance and functionality changes to the Flowtime website. We'll cover some of the the most common Flowtime website modifications.
Add a new page
- Create an ASPX file in the site root folder.
- Rename the file using a meaningful name.
- Open and edit the file.
Example
In this example we display the Group Messages Grid control and Form Viewer control on the new page MyPage.aspx. The Form Viewer control enables you to add any form view to a page without referencing a specific process. The sections we added are highlighted.
For the controls to work, you need to add a <Register> tag for each control on the page that you add. You can find these links in the Flowtime Application in the IIS.
IMPORTANT: If you need to add your own code behind for the page, you must inherit from the PortalBasePage class from PNMsoft.Sequence.Runtime.Web.UI.dll.
<%@ Page Title="" Language="C#" CodeBehind="Default.aspx.cs"
Inherits="PNMsoft.Sequence.Runtime.Web.UI.Pages.Default" AutoEventWireup="true"
%>
<%@ Register TagPrefix="sq" TagName="GroupMessagesGridControl"
 Src="~/_controltemplates/Flowtime/GroupMessagesGridControl.ascx" %>
 <%@ Register TagPrefix="sq" TagName="FormViewerControl"
 Src="~/_controltemplates/Flowtime/FormViewerControl.ascx" %>
<asp:Content ID="Content" ContentPlaceHolderID="content" runat="server">
    <div class="sqpt-container">

	  <div class="sqpt-grid-control">
 <sq:GroupMessagesGridControl ID="GroupMessagesGridControl"
PageSize="5" DisplayVariables="false"
 runat="server" />
 </div>

 <sq:FormViewerControl ID="ReportsView"
FormVirtualPath="~/SequenceForms/wf/Test/Test/Form1/DefaultView.ascx"
 runat="server" />
      </div>
</asp:Content>
Add a Page that Includes a Dashboard
- Access the ASPX file that you created in the root folder.
- Add the following AnalyticsDashboardControl declaration.
<%@ Register TagPrefix="sq" TagName="AnalyticsDashboardControl"
 Src="~/_controltemplates/Flowtime/AnalyticsDashboardControl.ascx" %>
- Add the following markup to the page.
<asp:Content ID="Content" ContentPlaceHolderID="Content" runat="server"> <div class="sqpt-container"> <sq:AnalyticsDashboardControl runat="server" ID="AnalyticsDashboardControl" Transport="flowtime" ThemeName="Default" Mode="Auto"></sq:AnalyticsDashboardControl> </div> </asp:Content> - Configure the following properties.
Property Description DataStreamName name of the dashboard suite you are using. Layout name of the dashboard from the dashboard suite that you want to display Transport by default, the Transport is flowtime. Only advanced users should modify this property. - (Optional) Configure the follow properties as necessary.
Property Description ThemeName by default, ThemeName is Default. The other valid value is Compact. Mode by default, Mode is Auto. The other valid values are Fixed and Fluid. This affects the dashboard layout, whether it is fixed, fluid, or set automatically. - (Optional) Advanced users can configure the following properties as necessary.
Property Description Table Title Parameters can include different context parameters, such as SolutionId of a HotOperations solution, and so on. For this to work, users should inherit the code-behind from specific classes. DataStreamsURL points to the data stream's Web service.
The final ASPX file will contain the following markup.
<asp:Content ID="Content" ContentPlaceHolderID="Content" runat="server">
    <div class="sqpt-container">
      <sq:AnalyticsDashboardControl runat="server" ID="AnalyticsDashboardControl"
Transport="flowtime" ThemeName="Default" Mode="Auto"></sq:AnalyticsDashboardControl>
    </div>
</asp:Content>
Add a Link to the Banner
- Open the
Default.configfile. - Copy a
<MenuItem>section, and paste it under the existing<MenuItem>section.<MenuItem Id="Inbox" Command="Inbox" Text="{$resources.Inbox}" Tooltip="{$resources.Inbox}"> </MenuItem> - Edit the values in the
<MenuItem>section.<MenuItem Id="MyPage" Command="MyPage" Text="My Page" Tooltip="MY Page"> </MenuItem>
- Copy a NavigateToUrlCommand section and paste it below the existing NavigateToUrlCommand section. This section determines the URL of the link.
<NavigateToUrlCommand
  Id="Inbox"
  Url="~/Inbox.aspx?MessageInstanceViewType=2">
</NavigateToUrlCommand>
- Edit the values in the NavigateToUrlCommand section with the following information.
<NavigateToUrlCommand
  Id="MyPage"
  Url="~/MyPage.aspx">
</NavigateToUrlCommand>
- Perform IIS Reset and refresh the homepage.
Edit an Existing Page
- Make a copy of the page you want to edit in the root folder. For example, copy the
Inbox.aspxfile to theMyPage.aspxfile. - Edit the file as necessary. In the example below, we added a new user control to the
Inbox.aspxfile. The added sections are highlighted.<%@ Page Title="" Language="C#" MenuId="Portal" SelectedMenuItemId="MyPage" AutoEventWireup="false" CodeBehind="Inbox.aspx.cs" Inherits="PNMsoft.Sequence.Runtime.Web.UI.Pages.Inbox" %> <%@ Register TagPrefix="sq" TagName="InboxSummaryControl" Src="~/_controltemplates/Flowtime/InboxSummaryControl.ascx" %> <%@ Register TagPrefix="sq" TagName="NewProcessControl" Src="~/_controltemplates/Flowtime/NewProcessControl.ascx" %> <%@ Register TagPrefix="sq" TagName="ProcessesIOwnControl" Src="~/_controltemplates/Flowtime/ProcessesIOwnControl.ascx" %> <%@ Register TagPrefix="sq" TagName="UserMessagesGridControl" Src="~/_controltemplates/Flowtime/UserMessagesGridControl.ascx" %> <%@ Register TagPrefix="sq" TagName="GroupMessagesGridControl" Src="~/_controltemplates/Flowtime/GroupMessagesGridControl.ascx" %> <asp:Content ID="Content" ContentPlaceHolderID="content" runat="server"> <div class="sqpt-container"> <div class="sqpt-summary-controls"> <div> <sq:NewProcessControl ID="NewProcessControl" runat="server" /> </div> <div> <sq:InboxSummaryControl ID="InboxSummaryControl"InboxPage="Inbox.aspx" runat="server" /> </div> <div> <sq:ProcessesIOwnControl ID="ProcessesIOwnControl" ProcessesIOwnPage="OpenProcesses.aspx" runat="server" /> </div> </div> <div class="sqpt-grid-control"> <sq:UserMessagesGridControl ID="UserMessagesGridControl" PageSize="30" DisplayVariables="true" ConfigName="Portal" runat="server" /> </div> <div class="sqpt-grid-control"> <sq:GroupMessagesGridControl ID="GroupMessagesGridControl" PageSize="5" DisplayVariables="false" runat="server" /> </div> </div> - Change the page reference in the
Default.configfile, which is located atC:\Program Files\PNMsoft\Shared Resources\Components\Flowtime\Config\Portal\Commands.<NavigateToUrlCommand Id="Inbox" Url="~/CustomInbox.aspx?MessageInstanceViewType=2"> </NavigateToUrlCommand>
- Edit other references as necessary. For example, the Inbox Summary control.
Create a Flowtime Page Without the Top Menu and Side Menu
To create a Flowtime page without the top menu and side menu, add MasterPageFile="~/Layouts/Masters/Empty.master".
Example
In this example, we modify the My Tasks page so that only the grid displays for the end user.
<%@ Page Title="My Tasks" ResourceTitle="MyTasks" MasterPageFile="~/Layouts/Masters/Empty.Master" MenuId="Portal" SubMenuId="MyTasks" SelectedMenuItemId="MyTasks" SelectedSubMenuItemId="MyTasks" Language="C#" AutoEventWireup="true" CodeBehind="MyTasks.aspx.cs" Inherits="PNMsoft.Sequence.Runtime.Web.UI.Pages.MyTasks, PNMsoft.Sequence.Runtime.Web.UI, Version=8.0.0.0, Culture=neutral, PublicKeyToken=0a1a1b90c1c5dca1" %>
<%@ Register TagPrefix="sq" TagName="UserMessagesGridControl"
Src="~/_controltemplates/Flowtime/UserMessagesGridControl.ascx" %>
<asp:Content ID="Content" ContentPlaceHolderID="Content" runat="server">
<div class="sqpt-container">
<div class="sqpt-grid-control">
<sq:UserMessagesGridControl ID="UserMessagesGridControl" PageSize="20" DisplayVariables="true" ConfigName="Portal"
runat="server" MessageInstanceViewItemType="TaskOnly" />
</div>
</div>
</asp:Content>
Change the Flowtime Website Branding
To change the site's color scheme and branding you should create your own theme.
- Duplicate the
Sequence8folder inC:\Program Files\PNMsoft\Shared Resources\Themes. - Enter a meaningful name for the folder, such as
CustomTheme. - Modify the
flowtimesite.cssfile as necessary. - Change the
Themekey in theweb.configfile to your new folder.<add key="PNMsoft.Sequence.Flowtime.Theme" value="MyCustomeTheme"/>
Customize Flowtime Grids
You can customize Flowime grids to add a scroll bar and aspects of cell width for Flowtime grids.
Layout
The layout determines the column and table widths. The default column width is 130. You can overwrite the default width in the service configuration file.
Layout Parameters
| Parameter | Description |
|---|---|
| Auto | Column width is set according to the widest unbreakable content in the cells. This option can run slower than the Fixed option, because all content in the grid needs to be read before determining the final layout. |
| Fixed | This is the default configuration. Horizontal layout only depends on the table's width and the width of the columns, not the contents of the cells. The Fixed layout enables a browser to lay out the table faster than the automatic table layout. The browser can display the table after the first row is read. It is important to be aware of the column widths configured in the global and workflow variables. |
Layout - Auto
Layout - Fixed
Adaptive
The Adaptive property defines the grid's scroll bar. By default, the Adaptive property is set to True, and the layout is set to Fixed.
Adaptive Parameters
| Parameter | Description |
|---|---|
| True | Set the Kendo grid native scrollable to True when both the header and table content have their own tables. This can be used for Auto and Fixed layouts. |
| False | The grid does not have its own scroll bar (but the page is still scrollable). |
Adaptive = True

AdaptiveHeight
The AdaptiveHeight property determines the grid's height. By default, the AdaptiveHeight property is set to -1.
AdaptiveHeight Parameters
| Value | Description |
|---|---|
| >0 | Custom height is used. |
| 0 | The grid determines the height. |
| -1 | The grid auto-resizes with the page. This option is preferable for pages with a single grid. |
Customize Column Width
To define local and global variables in the Process page grid, add only the the <workflowvariablescolumns> tag to the grid's ServiceMetadata.config file. Make sure you do not add both the <workflowvariablescolumns> and <globalvariablescolumns> tags.
Example
<workflowvariablescolumns>
  <ColumnTemplates>
<VariableDataBoundViewColumn
    DataField="Variable2Name" Width="200px"/>
  </ColumnTempates>
</workflowvariablescolumns>
V8.4
The Flowtime website enables you to provide Flowtime experience and functionality to end users without having to install SharePoint. It provides the option to add and edit pages quite easily, and because it's a website, there is no need to compile.
Understanding File Structure
After you install Flowtime website, there are several files you can modify that enable you to configure and edit the Flowtime website.
Flowtime website files
- web.config
- ASPX
- Control Template
- Default.config
- ServiceMetada config
web.config files
Allows you to control Flowtime website settings, such as culture, theme, database connection, and so on.
For example, you can set the Flowtime website language by editing the following key:<globalization culture="en-US" uiCulture="en-US" requestEncoding="utf-8" responseEncoding="utf-8" fileEncoding="utf-8" />
ASPX files
These files define the appearance and functionality of each page on the Flowtime website. For example, the Inbox.aspx file defines the Inbox page.
Control Template files
The Flowtime website is assembled from pages that host the user controls. For example, UserMessagesGridControl.ascx is used to display the User Messages grid.
File Location: {Site Physical Path}\CONTROLTEMPLATES\Flowtime
Default.config file
This file defines the top menu links in the Flowtime website. Here you can edit links, set the URL of each link, and add links to new pages.
File Location: C:\Program Files\PNMsoft\Shared Resources\Components\Flowtime\Config\Portal\Commands
ServiceMetadata config files
This set of config files define the way columns display for each grid. For example, the setting for Messages grid columns is defined in the MessagesServiceMetadata.Portal.Config file. Files with the word Portal in the file name are the files that define grids in the Flowtime website.
File Location: C:\Program Files\PNMsoft\Shared Resources\Components\Flowtime\Config\ServiceMetadata
Edit the Flowtime Website
You can easily add pages, edit pages, and make other appearance and functionality changes to the Flowtime website. We'll cover some of the the most common Flowtime website modifications.
Add a new page
- Create an ASPX file in the site root folder.
- Rename the file using a meaningful name.
- Open and edit the file.
Example
In this example we display the Group Messages Grid control and Form Viewer control on the new page MyPage.aspx. The Form Viewer control enables you to add any form view to a page without referencing a specific process. The sections we added are highlighted.
For the controls to work, you need to add a <Register> tag for each control on the page that you add. You can find these links in the Flowtime Application in the IIS.
IMPORTANT: If you need to add your own code behind for the page, you must inherit from the PortalBasePage class from PNMsoft.Sequence.Runtime.Web.UI.dll.
<%@ Page Title="" Language="C#" CodeBehind="Default.aspx.cs"
Inherits="PNMsoft.Sequence.Runtime.Web.UI.Pages.Default" AutoEventWireup="true"
%>
<%@ Register TagPrefix="sq" TagName="GroupMessagesGridControl"
 Src="~/_controltemplates/Flowtime/GroupMessagesGridControl.ascx" %>
 <%@ Register TagPrefix="sq" TagName="FormViewerControl"
 Src="~/_controltemplates/Flowtime/FormViewerControl.ascx" %>
<asp:Content ID="Content" ContentPlaceHolderID="content" runat="server">
    <div class="sqpt-container">

	  <div class="sqpt-grid-control">
 <sq:GroupMessagesGridControl ID="GroupMessagesGridControl"
PageSize="5" DisplayVariables="false"
 runat="server" />
 </div>

 <sq:FormViewerControl ID="ReportsView"
FormVirtualPath="~/SequenceForms/wf/Test/Test/Form1/DefaultView.ascx"
 runat="server" />
      </div>
</asp:Content>
Add a Page that Includes a Dashboard
- Access the ASPX file that you created in the root folder.
- Add the following AnalyticsDashboardControl declaration.
<%@ Register TagPrefix="sq" TagName="AnalyticsDashboardControl"
 Src="~/_controltemplates/Flowtime/AnalyticsDashboardControl.ascx" %>
- Add the following markup to the page.
<asp:Content ID="Content" ContentPlaceHolderID="Content" runat="server"> <div class="sqpt-container"> <sq:AnalyticsDashboardControl runat="server" ID="AnalyticsDashboardControl" Transport="flowtime" ThemeName="Default" Mode="Auto"></sq:AnalyticsDashboardControl> </div> </asp:Content> - Configure the following properties.
Property Description DataStreamName name of the dashboard suite you are using. Layout name of the dashboard from the dashboard suite that you want to display Transport by default, the Transport is flowtime. Only advanced users should modify this property. - (Optional) Configure the follow properties as necessary.
Property Description ThemeName by default, ThemeName is Default. The other valid value is Compact. Mode by default, Mode is Auto. The other valid values are Fixed and Fluid. This affects the dashboard layout, whether it is fixed, fluid, or set automatically. - (Optional) Advanced users can configure the following properties as necessary.
Property Description Table Title Parameters can include different context parameters, such as SolutionId of a HotOperations solution, and so on. For this to work, users should inherit the code-behind from specific classes. DataStreamsURL points to the data stream's Web service.
The final ASPX file will contain the following markup.
<asp:Content ID="Content" ContentPlaceHolderID="Content" runat="server">
    <div class="sqpt-container">
      <sq:AnalyticsDashboardControl runat="server" ID="AnalyticsDashboardControl"
Transport="flowtime" ThemeName="Default" Mode="Auto"></sq:AnalyticsDashboardControl>
    </div>
</asp:Content>
Add a Link to the Banner
- Open the
Default.configfile. - Copy a
<MenuItem>section, and paste it under the existing<MenuItem>section.<MenuItem Id="Inbox" Command="Inbox" Text="{$resources.Inbox}" Tooltip="{$resources.Inbox}"> </MenuItem> - Edit the values in the
<MenuItem>section.<MenuItem Id="MyPage" Command="MyPage" Text="My Page" Tooltip="MY Page"> </MenuItem>
- Copy a NavigateToUrlCommand section and paste it below the existing NavigateToUrlCommand section. This section determines the URL of the link.
<NavigateToUrlCommand
  Id="Inbox"
  Url="~/Inbox.aspx?MessageInstanceViewType=2">
</NavigateToUrlCommand>
- Edit the values in the NavigateToUrlCommand section with the following information.
<NavigateToUrlCommand
  Id="MyPage"
  Url="~/MyPage.aspx">
</NavigateToUrlCommand>
- Perform IIS Reset and refresh the homepage.
Edit an Existing Page
- Make a copy of the page you want to edit in the root folder. For example, copy the
Inbox.aspxfile to theMyPage.aspxfile. - Edit the file as necessary. In the example below, we added a new user control to the
Inbox.aspxfile. The added sections are highlighted.<%@ Page Title="" Language="C#" MenuId="Portal" SelectedMenuItemId="MyPage" AutoEventWireup="false" CodeBehind="Inbox.aspx.cs" Inherits="PNMsoft.Sequence.Runtime.Web.UI.Pages.Inbox" %> <%@ Register TagPrefix="sq" TagName="InboxSummaryControl" Src="~/_controltemplates/Flowtime/InboxSummaryControl.ascx" %> <%@ Register TagPrefix="sq" TagName="NewProcessControl" Src="~/_controltemplates/Flowtime/NewProcessControl.ascx" %> <%@ Register TagPrefix="sq" TagName="ProcessesIOwnControl" Src="~/_controltemplates/Flowtime/ProcessesIOwnControl.ascx" %> <%@ Register TagPrefix="sq" TagName="UserMessagesGridControl" Src="~/_controltemplates/Flowtime/UserMessagesGridControl.ascx" %> <%@ Register TagPrefix="sq" TagName="GroupMessagesGridControl" Src="~/_controltemplates/Flowtime/GroupMessagesGridControl.ascx" %> <asp:Content ID="Content" ContentPlaceHolderID="content" runat="server"> <div class="sqpt-container"> <div class="sqpt-summary-controls"> <div> <sq:NewProcessControl ID="NewProcessControl" runat="server" /> </div> <div> <sq:InboxSummaryControl ID="InboxSummaryControl"InboxPage="Inbox.aspx" runat="server" /> </div> <div> <sq:ProcessesIOwnControl ID="ProcessesIOwnControl" ProcessesIOwnPage="OpenProcesses.aspx" runat="server" /> </div> </div> <div class="sqpt-grid-control"> <sq:UserMessagesGridControl ID="UserMessagesGridControl" PageSize="30" DisplayVariables="true" ConfigName="Portal" runat="server" /> </div> <div class="sqpt-grid-control"> <sq:GroupMessagesGridControl ID="GroupMessagesGridControl" PageSize="5" DisplayVariables="false" runat="server" /> </div> </div> - Change the page reference in the
Default.configfile, which is located atC:\Program Files\PNMsoft\Shared Resources\Components\Flowtime\Config\Portal\Commands.<NavigateToUrlCommand Id="Inbox" Url="~/CustomInbox.aspx?MessageInstanceViewType=2"> </NavigateToUrlCommand>
- Edit other references as necessary. For example, the Inbox Summary control.
Change the Flowtime Website Branding
To change the site's color scheme and branding you should create your own theme.
- Duplicate the
Sequence8folder inC:\Program Files\PNMsoft\Shared Resources\Themes. - Enter a meaningful name for the folder, such as
CustomTheme. - Modify the
flowtimesite.cssfile as necessary. - Change the
Themekey in theweb.configfile to your new folder.<add key="PNMsoft.Sequence.Flowtime.Theme" value="MyCustomeTheme"/>
Customize Flowtime Grids
You can customize Flowime grids to add a scroll bar and aspects of cell width for Flowtime grids.
Layout
The layout determines the column and table widths. The default column width is 130. You can overwrite the default width in the service configuration file.
Layout Parameters
| Parameter | Description |
|---|---|
| Auto | Column width is set according to the widest unbreakable content in the cells. This option can run slower than the Fixed option, because all content in the grid needs to be read before determining the final layout. |
| Fixed | This is the default configuration. Horizontal layout only depends on the table's width and the width of the columns, not the contents of the cells. The Fixed layout enables a browser to lay out the table faster than the automatic table layout. The browser can display the table after the first row is read. It is important to be aware of the column widths configured in the global and workflow variables. |
Layout - Auto
Layout - Fixed
Adaptive
The Adaptive property defines the grid's scroll bar. By default, the Adaptive property is set to True, and the layout is set to Fixed.
Adaptive Parameters
| Parameter | Description |
|---|---|
| True | Set the Kendo grid native scrollable to True when both the header and table content have their own tables. This can be used for Auto and Fixed layouts. |
| False | The grid does not have its own scroll bar (but the page is still scrollable). |
Adaptive = True
AdaptiveHeight
The AdaptiveHeight property determines the grid's height. By default, the AdaptiveHeight property is set to -1.
AdaptiveHeight Parameters
| Value | Description |
|---|---|
| >0 | Custom height is used. |
| 0 | The grid determines the height. |
| -1 | The grid auto-resizes with the page. This option is preferable for pages with a single grid. |
Customize Column Width
To define local and global variables in the Process page grid, add only the the <workflowvariablescolumns> tag to the grid's ServiceMetadata.config file. Make sure you do not add both the <workflowvariablescolumns> and <globalvariablescolumns> tags.
Example
<workflowvariablescolumns>
  <ColumnTemplates>
<VariableDataBoundViewColumn
    DataField="Variable2Name" Width="200px"/>
  </ColumnTempates>
</workflowvariablescolumns>
V8.3
The Flowtime website enables you to provide user experience and functionality to end users without having to install SharePoint. It provides the option to add and edit pages quite easily, and because it's a website, there is no need to compile.
Understanding File Structure
After you install Flowtime website, there are several files you can modify that enable you to configure and edit the Flowtime website.
Flowtime website files
- web.config
- ASPX
- Control Template
- Default.config
- ServiceMetada config
web.config files
Allows you to control Flowtime website settings, such as culture, theme, database connection, and so on.
For example, you can set the Flowtime website language by editing the following key:<globalization culture="en-US" uiCulture="en-US" requestEncoding="utf-8" responseEncoding="utf-8" fileEncoding="utf-8" />
ASPX files
These files define the appearance and functionality of each page on the Flowtime website. For example, the Inbox.aspx file defines the Inbox page.
Control Template files
The Flowtime website is assembled from pages that host the user controls. For example, UserMessagesGridControl.ascx is used to display the User Messages grid.
File Location: {Site Physical Path}\CONTROLTEMPLATES\Flowtime
Default.config file
This file defines the top menu links in the Flowtime website. Here you can edit links, set the URL of each link, and add links to new pages.
File Location: C:\Program Files\PNMsoft\Shared Resources\Components\Flowtime\Config\Portal\Commands
ServiceMetadata config files
This set of config files define the way columns display for each grid. For example, the setting for Messages grid columns is defined in the MessagesServiceMetadata.Portal.Config file. Files with the word Portal in the file name are the files that define grids in the Flowtime website.
File Location: C:\Program Files\PNMsoft\Shared Resources\Components\Flowtime\Config\ServiceMetadata
Edit the Flowtime Website
You can easily add pages, edit pages, and make other appearance and functionality changes to the Flowtime website. We'll cover some of the the most common Flowtime website modifications.
Add a new page
- Create an ASPX file in the site root folder.
- Rename the file using a meaningful name.
- Open and edit the file.
Example
In this example we display the Group Messages Grid control and Form Viewer control on the new page MyPage.aspx. The Form Viewer control enables you to add any form view to a page without referencing a specific process. The sections we added are highlighted.
For the controls to work, you need to add a <Register> tag for each control on the page that you add. You can find these links in the Flowtime Application in the IIS.
IMPORTANT: If you need to add your own code behind for the page, you must inherit from the PortalBasePage class from PNMsoft.Sequence.Runtime.Web.UI.dll.
<%@ Page Title="" Language="C#" CodeBehind="Default.aspx.cs"
Inherits="PNMsoft.Sequence.Runtime.Web.UI.Pages.Default" AutoEventWireup="true"
%>
<%@ Register TagPrefix="sq" TagName="GroupMessagesGridControl"
 Src="~/_controltemplates/Flowtime/GroupMessagesGridControl.ascx" %>
 <%@ Register TagPrefix="sq" TagName="FormViewerControl"
 Src="~/_controltemplates/Flowtime/FormViewerControl.ascx" %>
<asp:Content ID="Content" ContentPlaceHolderID="content" runat="server">
    <div class="sqpt-container">

	  <div class="sqpt-grid-control">
 <sq:GroupMessagesGridControl ID="GroupMessagesGridControl"
PageSize="5" DisplayVariables="false"
 runat="server" />
 </div>

 <sq:FormViewerControl ID="ReportsView"
FormVirtualPath="~/SequenceForms/wf/Test/Test/Form1/DefaultView.ascx"
 runat="server" />
      </div>
</asp:Content>
Add a Page that Includes a Dashboard
- Access the ASPX file that you created in the root folder.
- Add the following AnalyticsDashboardControl declaration.
<%@ Register TagPrefix="sq" TagName="AnalyticsDashboardControl"
 Src="~/_controltemplates/Flowtime/AnalyticsDashboardControl.ascx" %>
- Add the following markup to the page.
<asp:Content ID="Content" ContentPlaceHolderID="Content" runat="server"> <div class="sqpt-container"> <sq:AnalyticsDashboardControl runat="server" ID="AnalyticsDashboardControl" Transport="flowtime" ThemeName="Default" Mode="Auto"></sq:AnalyticsDashboardControl> </div> </asp:Content> - Configure the following properties.
Property Description DataStreamName name of the dashboard suite you are using. Layout name of the dashboard from the dashboard suite that you want to display Transport by default, the Transport is flowtime. Only advanced users should modify this property. - (Optional) Configure the follow properties as necessary.
Property Description ThemeName by default, ThemeName is Default. The other valid value is Compact. Mode by default, Mode is Auto. The other valid values are Fixed and Fluid. This affects the dashboard layout, whether it is fixed, fluid, or set automatically. - (Optional) Advanced users can configure the following properties as necessary.
Property Description Table Title Parameters can include different context parameters, such as SolutionId of a HotOperations solution, and so on. For this to work, users should inherit the code-behind from specific classes. DataStreamsURL points to the data stream's Web service.
The final ASPX file will contain the following markup.
<asp:Content ID="Content" ContentPlaceHolderID="Content" runat="server">
    <div class="sqpt-container">
      <sq:AnalyticsDashboardControl runat="server" ID="AnalyticsDashboardControl"
Transport="flowtime" ThemeName="Default" Mode="Auto"></sq:AnalyticsDashboardControl>
    </div>
</asp:Content>
Add a Page Without the Top Menu and Side Menu
You can customize any Flowtime page so that the header and side bar do not display on the page.
Add a Link to the Top Banner
- Open the
Default.configfile. - Copy a
<MenuItem>section, and paste it under the existing<MenuItem>section.<MenuItem Id="Inbox" Command="Inbox" Text="{$resources.Inbox}" Tooltip="{$resources.Inbox}"> </MenuItem> - Edit the values in the
<MenuItem>section.<MenuItem Id="MyPage" Command="MyPage" Text="My Page" Tooltip="MY Page"> </MenuItem>
- Copy a NavigateToUrlCommand section and paste it below the existing NavigateToUrlCommand section. This section determines the URL of the link.
<NavigateToUrlCommand
  Id="Inbox"
  Url="~/Inbox.aspx?MessageInstanceViewType=2">
</NavigateToUrlCommand>
- Edit the values in the NavigateToUrlCommand section with the following information.
<NavigateToUrlCommand
  Id="MyPage"
  Url="~/MyPage.aspx">
</NavigateToUrlCommand>
- Perform IIS Reset and refresh the homepage.
Edit an Existing Page
- Make a copy of the page you want to edit in the root folder. For example, copy the
Inbox.aspxfile to theMyPage.aspxfile. - Edit the file as necessary. In the example below, we added a new user control to the
Inbox.aspxfile. The added sections are highlighted.<%@ Page Title="" Language="C#" MenuId="Portal" SelectedMenuItemId="MyPage" AutoEventWireup="false" CodeBehind="Inbox.aspx.cs" Inherits="PNMsoft.Sequence.Runtime.Web.UI.Pages.Inbox" %> <%@ Register TagPrefix="sq" TagName="InboxSummaryControl" Src="~/_controltemplates/Flowtime/InboxSummaryControl.ascx" %> <%@ Register TagPrefix="sq" TagName="NewProcessControl" Src="~/_controltemplates/Flowtime/NewProcessControl.ascx" %> <%@ Register TagPrefix="sq" TagName="ProcessesIOwnControl" Src="~/_controltemplates/Flowtime/ProcessesIOwnControl.ascx" %> <%@ Register TagPrefix="sq" TagName="UserMessagesGridControl" Src="~/_controltemplates/Flowtime/UserMessagesGridControl.ascx" %> <%@ Register TagPrefix="sq" TagName="GroupMessagesGridControl" Src="~/_controltemplates/Flowtime/GroupMessagesGridControl.ascx" %> <asp:Content ID="Content" ContentPlaceHolderID="content" runat="server"> <div class="sqpt-container"> <div class="sqpt-summary-controls"> <div> <sq:NewProcessControl ID="NewProcessControl" runat="server" /> </div> <div> <sq:InboxSummaryControl ID="InboxSummaryControl"InboxPage="Inbox.aspx" runat="server" /> </div> <div> <sq:ProcessesIOwnControl ID="ProcessesIOwnControl" ProcessesIOwnPage="OpenProcesses.aspx" runat="server" /> </div> </div> <div class="sqpt-grid-control"> <sq:UserMessagesGridControl ID="UserMessagesGridControl" PageSize="30" DisplayVariables="true" ConfigName="Portal" runat="server" /> </div> <div class="sqpt-grid-control"> <sq:GroupMessagesGridControl ID="GroupMessagesGridControl" PageSize="5" DisplayVariables="false" runat="server" /> </div> </div> - Change the page reference in the
Default.configfile, which is located atC:\Program Files\PNMsoft\Shared Resources\Components\Flowtime\Config\Portal\Commands.<NavigateToUrlCommand Id="Inbox" Url="~/CustomInbox.aspx?MessageInstanceViewType=2"> </NavigateToUrlCommand>
- Edit other references as necessary. For example, the Inbox Summary control.
Change the Flowtime Website Branding
To change the site's color scheme and branding you should create your own theme.
- Duplicate the
Sequence8folder inC:\Program Files\PNMsoft\Shared Resources\Themes. - Enter a meaningful name for the folder, such as
CustomTheme. - Modify the
flowtimesite.cssfile as necessary. - Chate the
Themekey in theweb.configfile to your new folder.<add key="PNMsoft.Sequence.Flowtime.Theme" value="MyCustomeTheme"/>
For more details, see the Flowtime Website Configuration guide.
V8.2
The Flowtime Website Configuration guide describes how to configure Flowtime for Cora SeQuence 8.2.
Click here to open the guide.
For information on installing Flowtime on Cora SeQuence V8.2 and later, see the Cora SeQuence Installation Guide.
V8.1
The Flowtime Website Installation and Configuration guide describes how to install and configure the Flowtime website for Cora SeQuence 8.1.
Click here to open the guide.
V7.4-V8.0
Configure the Flowtime environment
The Flowtime Configuration Options guide describes how to configure Flowtime . It focuses on customizing the columns in grids and commands in grid toolbars, and edit menus.
There are two levels of configuration.
- Basic: configure Flowtime using the Flowtime GUI.
- Advanced: configure Flowtime using Flowtime configuration files.
Click here to open the guide.

— Nick on 02/19/2018
Hello, will the Theme's section be updated for version 8.5? It doesn't seem to point to the correct css file. It looks like there should now be a ProcessPortal.css somewhere.
— Alex on 02/01/2018
Hi John. Thanks for catching that. I've updated the article to point to the correct location: C:\Program Files\PNMsoft\Shared Resources\Components\Flowtime\Config\Portal\Commands
— John Jay on 01/31/2018
In Add a Link to the Banner, where is the Default.config file located?