Starting with V4.0, Cora OpsManager has been renamed to Cora Case Manager.
V4.0
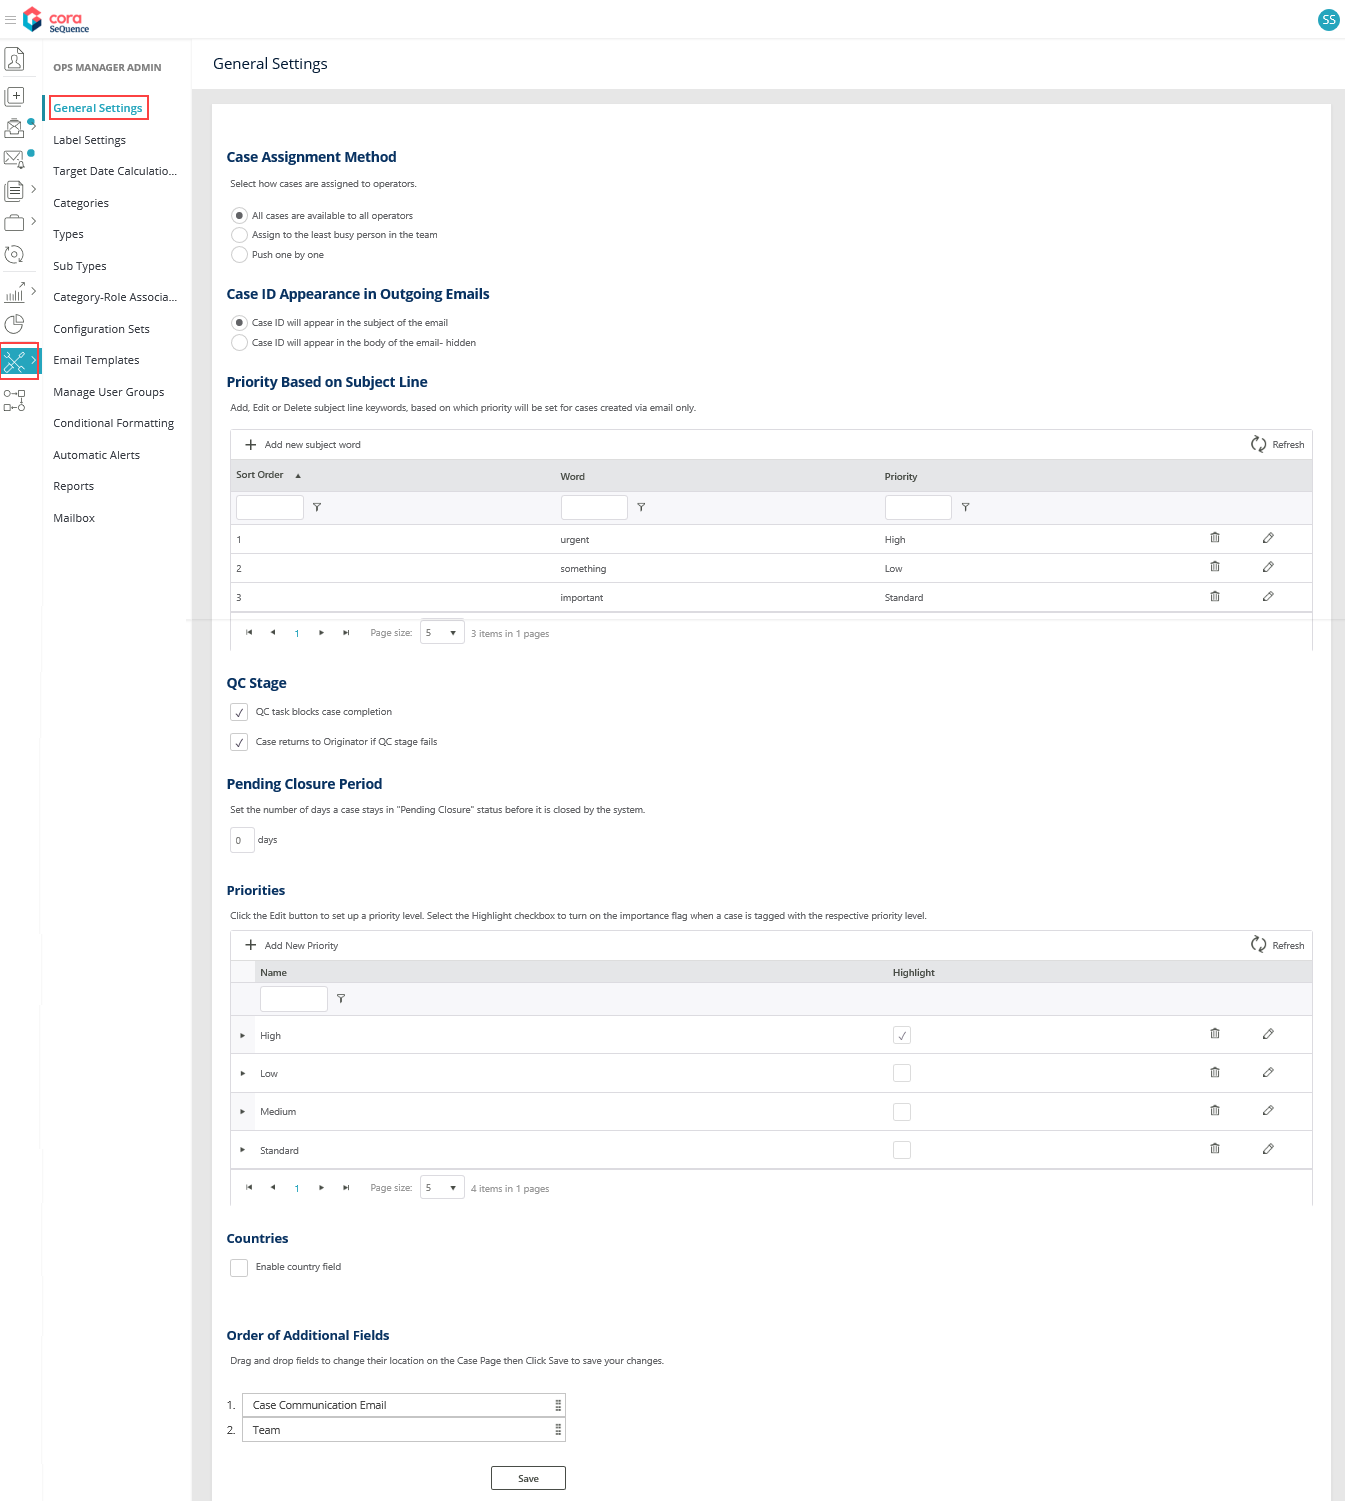
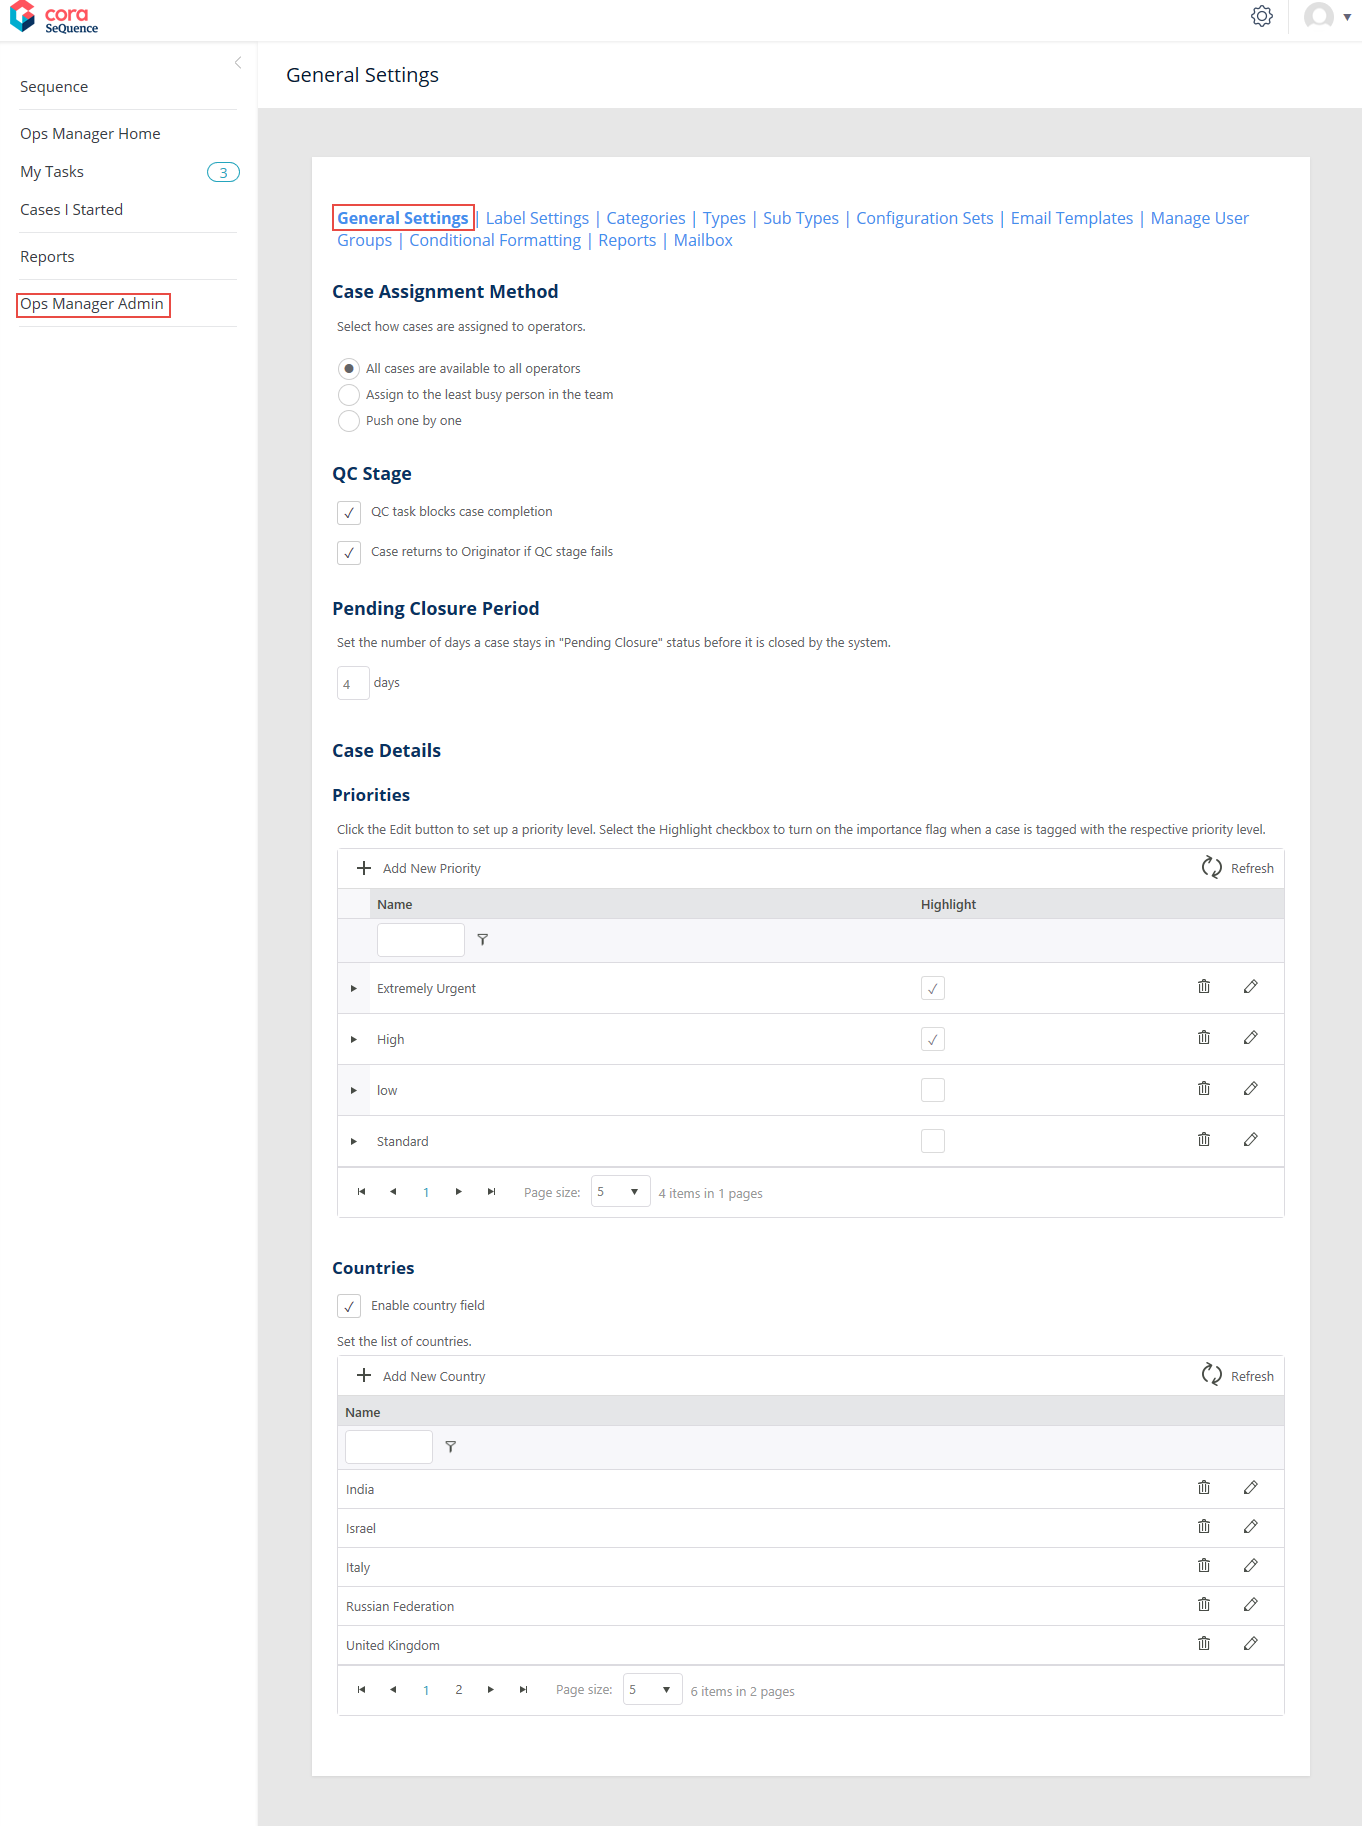
The pre-defined general settings are available to power users on General Settings tab under Ops Manager Admin. Settings made through this tab are in sync with the respective lookup tables on Admin console. Any changes made here are updated accordingly in the lookup tables.
To make general settings:
- Go to Flowtime > Ops Manager > Ops Manager Admin > General Settings.
- On General Settings page, make the required changes.
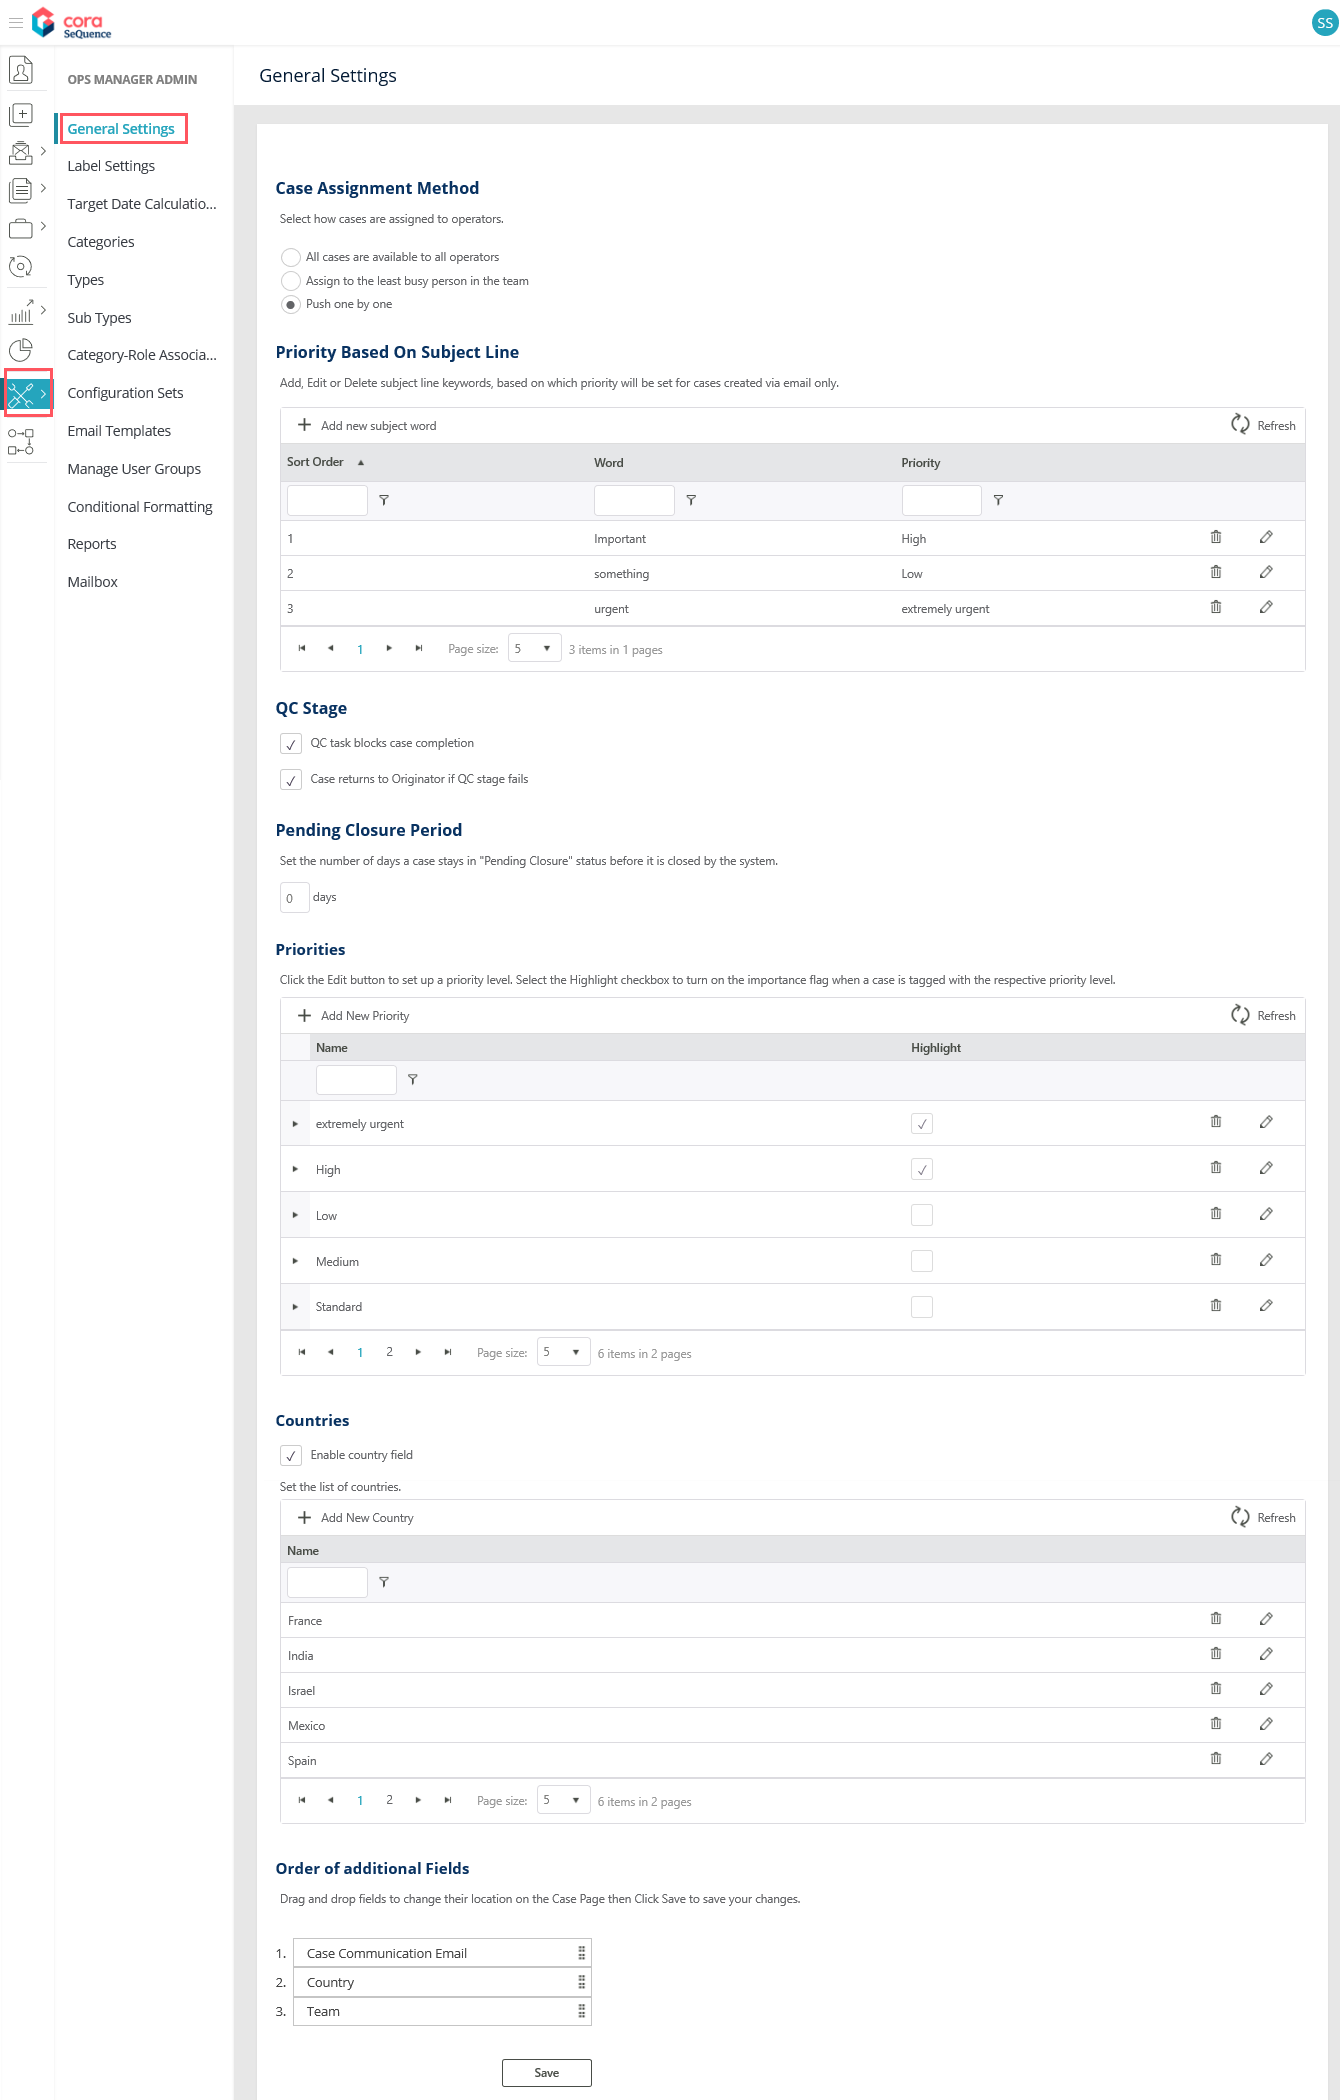
Case Assignment Method
In this section, select one of the three options to chose how a new case is assigned to an operator.
- All cases are available to all operators: makes the case available to all the operators in a team.
- Assign to the least busy person in the team: assigns the case to the least busy operator in the team.
- Push one by one: assigns the case one by one to all the operators.
NOTE
You may choose to hide this section from the General Settings page by making changes in PlatformConfig lookup. For details, see the Modify PlatformConfig Lookup article.
Case ID Appearance in Outgoing Emails
In this section, select the option to choose if the Case ID should appear in the outgoing email Subject line or the email body.
If you choose "Case ID will appear in the subject of the email" option then the Case ID will be displayed in the subject line of all case related emails, except for the Conversations tab on case details page where the Case ID will not appear in the email subject.
Choosing "Case ID will appear in the body of the email - hidden" adds the Case ID to email body, but keeps it hidden from the recipients.
Priority Based on Subject Line
In this section, add, edit or delete the subject line keywords based on which the priority of a Case will be set. This is applicable for all the new and existing cases created via email.
To add new subject line keyword,
- Click + Add new subject word.
- Fill in the Sort Order and the keyword.
- Choose the Priority from list.
- Click
 to save the record.
NOTE
For a Case, the priority based on subject-line is considered over the priority set in the Configuration Set.
To edit an existing record, click the edit icon ![]() . Click the delete icon
. Click the delete icon ![]() to delete an existing record.
to delete an existing record.
QC Stage
In this section, make QC stage settings that are applicable on a case in QC.
- QC task blocks case completion: select this check box to make QC task block the case completion.
- Case returns to Originator if QC stage fails: select this check box to return the case to the same operator (who has sent the case to QC), if QC stage fails.
Reminder Default Setting
Select Reminder to be sent check box to send email reminder notifications for a case by default. This setting ensures that the Reminder Required check box in the emails sent from a case is selected by default.
For more details on email reminder notifications, see this article.
Pending Closure Period
This section allows you to set the number of days for which a case will stay in Pending Closure state before getting closed.
Priorities
In this section, add new and edit the existing priorities, and set importance flag for them.
To add new priority:
- In the priorities section, click + Add New Priority.
- Add Name.
- Click to save changes or click
 to discard changes.
Select the Highlight check box to turn on the importance flag in the grid on Flowtime, for some particular priority.
To edit an existing priority, click edit icon for the record. Make the changes, and click ![]() .
.
Countries
In this section, select the Enable country field check box to display the Country field on Case Details page.
On selecting the check box, the list of already added countries is displayed in a grid. You may add new countries to the list using + Add New Country.
Auto System Notifications Templates
This section allows you to edit the default template for CC, Reject and Reminders emails for a case.
Click edit icon against each notification to edit the template. A new window appears for you to make the changes to the template. Make the changes and click Update.
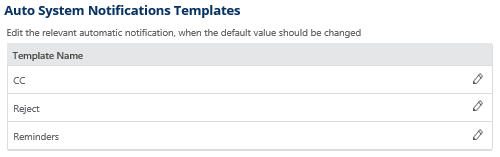
The updates made here overrides the default templates.
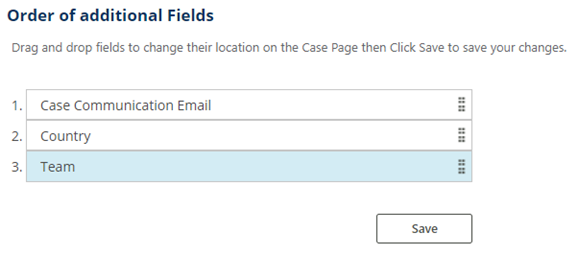
Order of additional fields
In this section, drag and drop the additional fields to change their placement on the Case details page. Click Save to save the changes.
V3.3
The pre-defined general settings are available to power users on General Settings tab under Ops Manager Admin. Settings made through this tab are in sync with the respective lookup tables on Admin console. Any changes made here are updated accordingly in the lookup tables.
To make general settings:
- Go to Flowtime > Ops Manager > Ops Manager Admin > General Settings.
- On General Settings page, make the required changes.
Case Assignment Method
In this section, select one of the three options to chose how a new case is assigned to an operator.
- All cases are available to all operators: makes the case available to all the operators in a team.
- Assign to the least busy person in the team: assigns the case to the least busy operator in the team.
- Push one by one: assigns the case one by one to all the operators.
NOTE
You may choose to hide this section from the General Settings page by making changes in PlatformConfig lookup. For details, see the Modify PlatformConfig Lookup article.
Case ID Appearance in Outgoing Emails
In this section, select the option to choose if the Case ID should appear in the outgoing email Subject line or the email body.
If you choose "Case ID will appear in the subject of the email" option then the Case ID will be displayed in the subject line of all case related emails, except for the Conversations tab on case details page where the Case ID will not appear in the email subject.
Choosing "Case ID will appear in the body of the email - hidden" adds the Case ID to email body, but keeps it hidden from the recipients.
Priority Based on Subject Line
In this section, add, edit or delete the subject line keywords based on which the priority of a Case will be set. This is applicable for all the new and existing cases created via email.
To add new subject line keyword,
- Click + Add new subject word.
- Fill in the Sort Order and the keyword.
- Choose the Priority from list.
- Click to save the record.
NOTE
For a Case, the priority based on subject-line is considered over the priority set in the Configuration Set.
To edit an existing record, click the edit icon ![]() . Click the delete icon
. Click the delete icon ![]() to delete an existing record.
to delete an existing record.
QC Stage
In this section, make QC stage settings that are applicable on a case in QC.
- QC task blocks case completion: select this check box to make QC task block the case completion.
- Case returns to Originator if QC stage fails: select this check box to return the case to the same operator (who has sent the case to QC), if QC stage fails.
Reminder Default Setting
Select Reminder to be sent check box to send email reminder notifications for a case by default. This setting ensures that the Reminder Required check box in the emails sent from a case is selected by default.
For more details on email reminder notifications, see this article.
Pending Closure Period
This section allows you to set the number of days for which a case will stay in Pending Closure state before getting closed.
Priorities
In this section, add new and edit the existing priorities, and set importance flag for them.
To add new priority:
- In the priorities section, click + Add New Priority.
- Add Name.
- Click to save changes or click to discard changes.
Select the Highlight check box to turn on the importance flag in the grid on Flowtime, for some particular priority.
To edit an existing priority, click edit icon for the record. Make the changes, and click ![]() .
.
Countries
In this section, select the Enable country field check box to display the Country field on Case Details page.
On selecting the check box, the list of already added countries is displayed in a grid. You may add new countries to the list using + Add New Country.
Auto System Notifications Templates
This section allows you to edit the default template for CC, Reject and Reminders emails for a case.
Click edit icon against each notification to edit the template. A new window appears for you to make the changes to the template. Make the changes and click Update.
The updates made here overrides the default templates.
Order of additional fields
In this section, drag and drop the additional fields to change their placement on the Case details page. Click Save to save the changes.
V3.2
The pre-defined general settings are available to power users on General Settings tab under Ops Manager Admin. Settings made through this tab are in sync with the respective lookup tables on Admin console. Any changes made here are updated accordingly in the lookup tables.
To make general settings:
- Go to Flowtime > Ops Manager > Ops Manager Admin > General Settings.
- On General Settings page, make the required changes.

Case Assignment Method
In this section, select one of the three options to chose how a new case is assigned to an operator.
- All cases are available to all operators: makes the case available to all the operators in a team.
- Assign to the least busy person in the team: assigns the case to the least busy operator in the team.
- Push one by one: assigns the case one by one to all the operators.
NOTE
You may choose to hide this section from the General Settings page by making changes in PlatformConfig lookup. For details, see the Modify PlatformConfig Lookup article.
Case ID Appearance in Outgoing Emails
In this section, select the option to choose if the Case ID should appear in the outgoing email Subject line or the email body.
If you choose "Case ID will appear in the subject of the email" option then the Case ID will be displayed in the subject line of all case related emails, except for the Conversations tab on case details page where the Case ID will not appear in the email subject.
Choosing "Case ID will appear in the body of the email - hidden" adds the Case ID to email body, but keeps it hidden from the recipients.
Priority Based on Subject Line
In this section, add, edit or delete the subject line keywords based on which the priority of a Case will be set. This is applicable for all the new and existing cases created via email.
To add new subject line keyword,
- Click + Add new subject word.
- Fill in the Sort Order and the keyword.
- Choose the Priority from list.
- Click to save the record.
NOTE
For a Case, the priority based on subject-line is considered over the priority set in the Configuration Set.
To edit an existing record, click the edit icon ![]() . Click the delete icon
. Click the delete icon ![]() to delete an existing record.
to delete an existing record.
QC Stage
In this section, make QC stage settings that are applicable on a case in QC.
- QC task blocks case completion: select this check box to make QC task block the case completion.
- Case returns to Originator if QC stage fails: select this check box to return the case to the same operator (who has sent the case to QC), if QC stage fails.
Pending Closure Period
This section allows you to set the number of days for which a case will stay in Pending Closure state before getting closed.
Priorities
In this section, add new and edit the existing priorities, and set importance flag for them.
To add new priority:
- In the priorities section, click + Add New Priority.
- Add Name.
- Click to save changes or click to discard changes.
Select the Highlight check box to turn on the importance flag in the grid on Flowtime, for some particular priority.
To edit an existing priority, click edit icon for the record. Make the changes, and click ![]() .
.
Countries
In this section, select the Enable country field check box to display the Country field on Case Details page.
On selecting the check box, the list of already added countries is displayed in a grid. You may add new countries to the list using + Add New Country.
Order of additional fields
In this section, drag and drop the additional fields to change their placement on the Case details page. Click Save to save the changes.
V3.0
In Cora OpsManager, the out-of-the-box (OOTB) general settings are available to power users on General Settings tab under Ops Manager Admin. Settings made through this tab are in sync with the respective lookup tables on Admin console. Any changes made here are updated accordingly in the lookup tables.
To make general settings:
- Go to Flowtime > Ops Manager > Ops Manager Admin > General Settings.
- On General Settings page, make the required changes.

Case Assignment Method
In this section, select one of the three options to chose how a new case is assigned to an operator.
- All cases are available to all operators: makes the case available to all the operators in a team.
- Assign to the least busy person in the team: assigns the case to the least busy operator in the team.
- Push one by one: assigns the case one by one to all the operators.
NOTE
You may choose to hide this section from the General Settings page by making changes in PlatformConfig lookup. For details, see the Modify PlatformConfig Lookup article.
Priority Based on Subject Line
In this section, add, edit or delete the subject line keywords based on which the priority of a Case will be set. This is applicable for all the new and existing cases created via email.
To add new subject line keyword,
- Click + Add new subject word.
- Fill in the Sort Order and the keyword.
- Choose the Priority from list.
- Click to save the record.
NOTE
For a Case, the priority set based on the subject-line is considered over the priority set in the Configuration Set.
To edit an existing record, click the edit icon ![]() . Click the delete icon
. Click the delete icon ![]() to delete an existing record.
to delete an existing record.
QC Stage
In this section, make QC stage settings that are applicable on a case in QC.
- QC task blocks case completion: select this check box to make QC task block the case completion.
- Case returns to Originator if QC stage fails: select this check box to return the case to the same operator (who has sent the case to QC), if QC stage fails.
Pending Closure Period
This section allows you to set the number of days for which a case will stay in Pending Closure state before getting closed.
Priorities
In this section, add new and edit the existing priorities, and set importance flag for them.
To add new priority:
- In the priorities section, click + Add New Priority.
- Add Name.
- Click to save changes or click to discard changes.
Select the Highlight check box to turn on the importance flag in the grid on Flowtime, for some particular priority.
To edit an existing priority, click edit icon for the record. Make the changes, and click ![]() .
.
Countries
In this section, select the Enable country field check box to display the Country field on Case Details page.
On selecting the check box, the list of already added countries is displayed in a grid. You may add new countries to the list using + Add New Country.
Order of additional fields
In this section, drag and drop the additional fields to change their placement on the Case details page. Click Save to save the changes.
Previous to V3.0
In Cora OpsManager, the out-of-the-box (OOTB) general settings are available to power users on General Settings tab under Ops Manager Admin. Settings made through this tab are in sync with the respective lookup tables on Admin console. Any changes made here are updated accordingly in the lookup tables.
To make general settings:
- Go to Flowtime > Ops Manager Admin > General Settings.
- On General Settings page, make the required changes.

Case Assignment Method
In this section, select one of the three radio button options to chose how a new case is assigned to an operator.
- All cases are available to all operators: makes the case available to all the operators in a team.
- Assign to the least busy person in the team: assigns the case to the least busy operator in the team.
- Push one by one: assigns the case one by one to all the operators.
NOTE
You may choose to hide this section from the General Settings page by making changes in PlatformConfig lookup. For details, see the Modify PlatformConfig Lookup article.
Priority Based on Subject-line
In this section, add, edit or delete the subject line keywords based on which the priority of a Case will be set. This is applicable for all the new and existing cases created via email.
To add new subject line keyword,
- Click + Add new subject word.
- Fill in the Sort Order and the keyword.
- Choose the Priority from list.
- Click to save the record.
NOTE
For a Case, the priority set based on the subject-line is considered over the priority set in the Configuration Set.
To edit an existing record, click the edit icon ![]() . Click the delete icon
. Click the delete icon ![]() to delete an existing record.
to delete an existing record.
QC Stage
In this section, make QC stage settings that are applicable on a case in QC.
- QC task blocks case completion: select this check box to make QC task block the case completion.
- Case returns to Originator if QC stage fails: select this check box to return the case to the same operator (who has sent the case to QC), if QC stage fails.
Pending Closure Period
This section allows you to set the number of days for which a case will stay in Pending Closure state before getting closed.
Priorities
In this section, add new and edit the existing priorities and set importance flag for them.
To add new priority:
- In the priorities section, click + Add New Priority.
- Add Name.
- Click to save changes or click to discard changes.
Select the Highlight check box to turn on the importance flag in the grid on Flowtime, for some particular priority.
To edit an existing priority, click edit icon for the record. Make the changes, and click ![]() .
.
Countries
In this section, select the Enable country field check box to display the Country field on Case Details page.
On selecting the check box, the list of already added countries is displayed in a grid. You may add new countries to the list using + Add New Country.
