Overview
Use the Service Bus Consumer activity to send messages to an Azure Service Bus queue or topic. Microsoft Azure Service Bus is a cloud-based messaging service used to connect and send information between applications, services and devices.
- Cora SeQuence can send messages of the following types: JSON, XML, plain text, or binary.
- Every message receives a unique Message ID.
- You can set up workflow expressions to send the message data.
Before you add a Service Bus Consumer activity to your workflow, you need to set up the service bus entity in Azure.
The service bus activity can currently work with two types of entity:
- Queues: one direction communication — one sender to one receiver. The message delivery follows a first in, first out (FIFO) method. That is, messages are received and processed in the same order in which they enter the queue. The service bus processes only one message at a time.
- Topics and subscriptions: one direction communication — one sender to several receivers, through subscriptions. Messages are sent to a topic and delivered to one or more subscriptions. The receiver does not communicate with the topic. Use topics if your activity requires sending messages to several receivers.
Use cases
You can use the Service Bus Consumer activity to expedite processes and reduce system load.
You can use the Service Bus Consumer activity to provide a better user experience while the system performs heavy calculations in the background. For example, you can use the Service Bus Consumer activity to send a "Your form was successfully submitted" message immediately after the user submits a form. To do this, place the Service Bus Consumer right after the form activity, and add a Service Bus Listener later on in the workflow to pick up the message from the Service Bus Consumer and resume the process.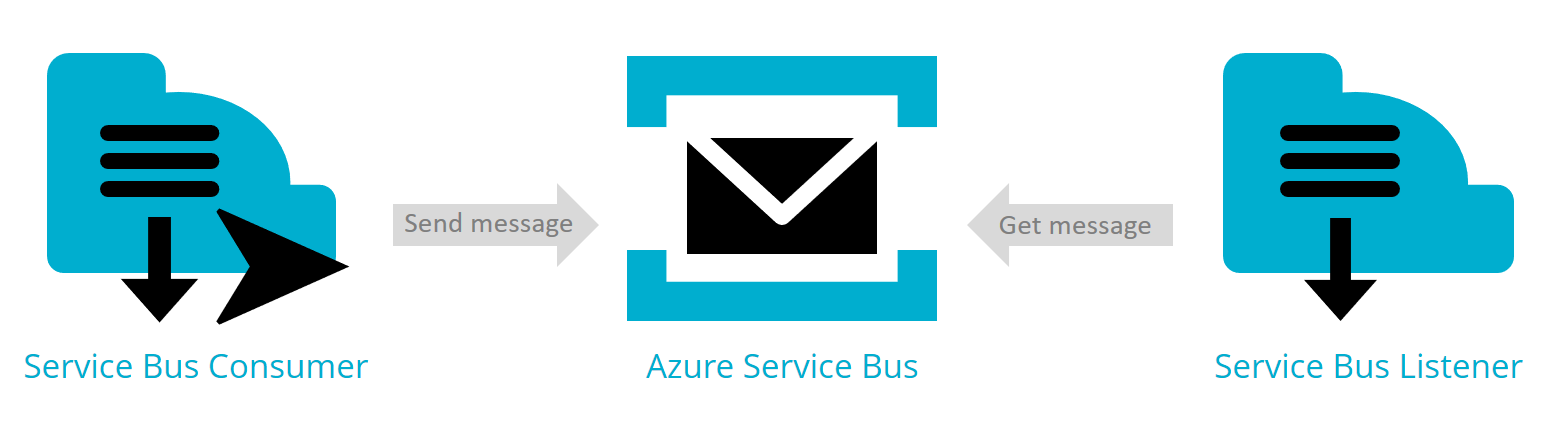
The Service Bus Consumer activity enables a “Fire and Forget” mechanism for integrations with 3rd-party systems. It can send a message to another system without needing to wait for a "complete" signal from the other system.
You can use the Service Bus Consumer activity as a means of communication between two workflow instances. One workflow can wait until the other workflow reaches a certain stage before it resumes.
Prerequisites
Make sure that you perform the following tasks, before you configure the Service Bus Consumer activity.
- Set up the Azure service bus namespace, which is a container for entities, such as queues and topics.
- Create a queue or topic, depending on your implementation requirement.
- Get the service bus Primary Connection String for your service bus namespace.
Create a new service bus connection
You can create a new Service Bus Connection during the configuration of the Service Bus Consumer activity, or on the Service Bus Connections page.
The Service Bus Connections page provides a list of all the available connections. On this page, you can create new service bus connections, edit, or delete existing connections.
Procedure
- Go to Administration > Global Settings > Service Bus Connections, and click Add New Record.
- Define the following settings:
- Name: Enter a significant name to the connection.
- Connection String: Enter the primary connection string for your service bus namespace.
- Entity Type: Select the relevant option:
- Queue: Select this option if the service bus uses a queue to transfer messages.
- Topic: Select this option, if the service bus uses a topic to transfer messages.
- Entity Path: Enter the name of the queue or topic configured for the service bus.
- Transport Type: Depending of the Service Bus connection, select one of the options (Available only for Cora SeQuence V9.3 and later versions):
- AMQP: Send messages using the Advanced Message Queuing Protocol (AMQP) over a TCP connection.
- AMQP over WebSockets: Send messages using the Advanced Message Queuing Protocol (AMQP) over an HTTPS connection.
- Click Add.
The new connection is added to the list of connections, and can be used to configure the Service Bus Consumer activity.
Configure the Service Bus Consumer activity
- To add a Service Bus Consumer activity to your workflow, in the App Studio, select Integration>Service Bus Consumer.
- Click the
 Service Bus Consumer activity.
 - On the Service Bus Consumer Properties screen, enter a significant name for the activity, and then click Next.
- On the Select Service Bus Connections screen, do one of the following:
- Select an existing connection string.
The list displays all the service bus connections that have already been configured. - Add a new connection string.
When you click New, the Service Bus Connection screen displays.
To create a new connection, see the Create a new service bus connection section.
- Select an existing connection string.
- Click Next.
- Under Service Bus Consumer Bindings, click
BrokeredMessage message, and clear the IsNull option.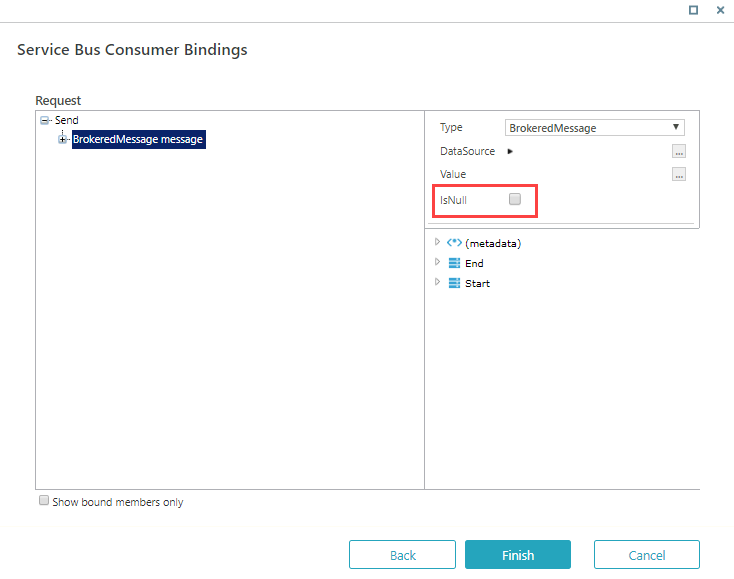
- Click the
 plus button next to the
 BrokeredMessage messagenode, to show the configurable properties. - To set up the the body of the message, click the MessageBodyContent Body.
The string content can be of the following types:- ByteArrayContent
- JsonContent
- StringContent
- XmlContent


- For more information on how to set up the predefined properties, see this page.
- To add custom properties, select List<PropertyPair<string,object>> Properties, and clear the IsNull option.
- Under Length, enter the number of properties that you want to add.
- Set up property values as required.
- Click Finish.
 | Want to learn by doing? Check out this hands-on exercise. Note that only internal users can access the link. |
